

 Danielle Alhiraki
Design & Build Quality
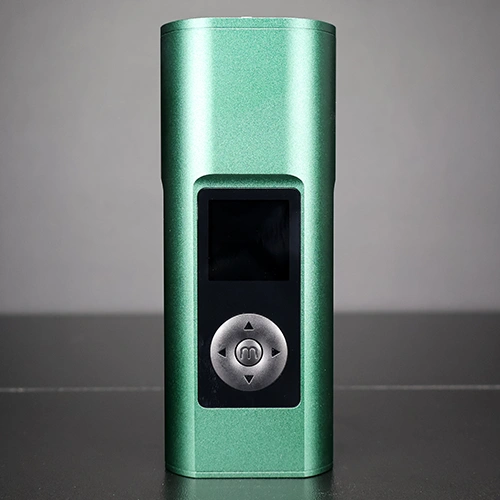
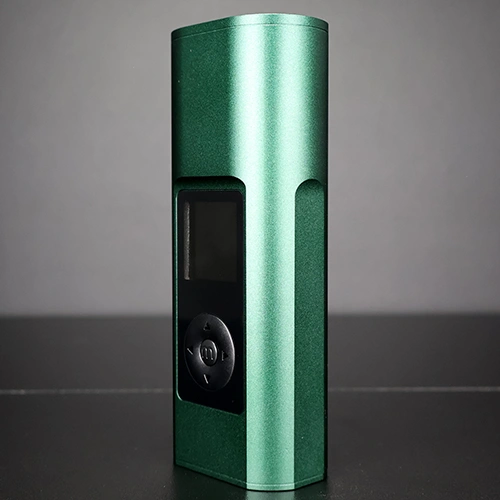
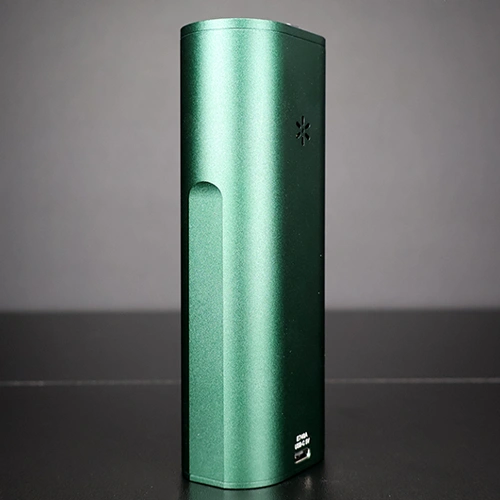
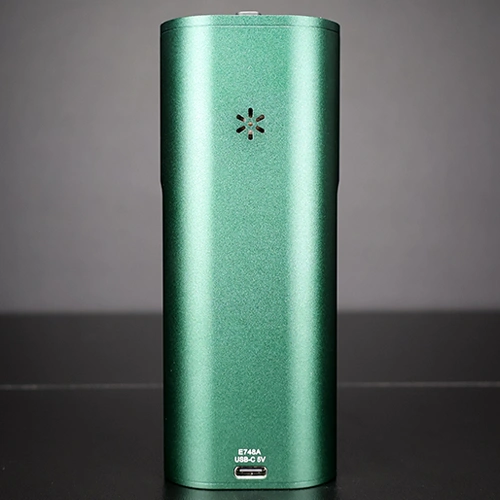
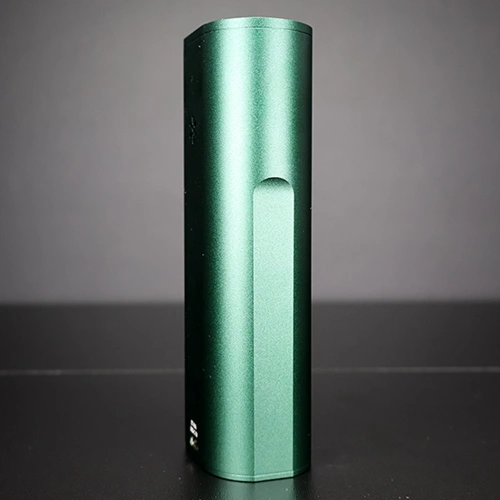
The Arizer Solo 3 is a freaking beast. This device is durable and solid, and thanks to its anodized aluminum, it resists scratches and stays cool while in use. As for the device itself, the build quality rivals devices from some of the most well-known brands, like Davinci and Storz & Bickel.
The Arizer Solo 3 measures 130mm tall, 52mm wide, and 33mm deep. The included glass tubes add to the device’s overall height, bringing it to 190mm with the aroma tube. The device is quite solid as well, weighing in at 240g.
It is on the larger side, and I would even consider it a stretch to call this a portable device. It is by no means pocket-friendly and would require a lot of extra care to take with you on the go. As I said before, the device itself can withstand a world war, but the glass mouthpiece is what makes this device so fragile. Traveling with the mouthpiece inserted is almost guaranteed to end with broken glass.
I am not saying it is impossible to travel with it, as you can remove the glass mouthpiece and secure it in the included travel tube, but it is definitely on the risky side. Personally, I would keep this device at home. It isn’t as big as a desktop device and can be easily taken around the house. That’s where I think it shines.
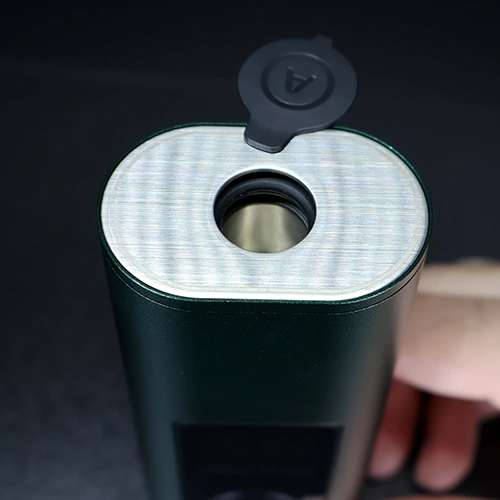
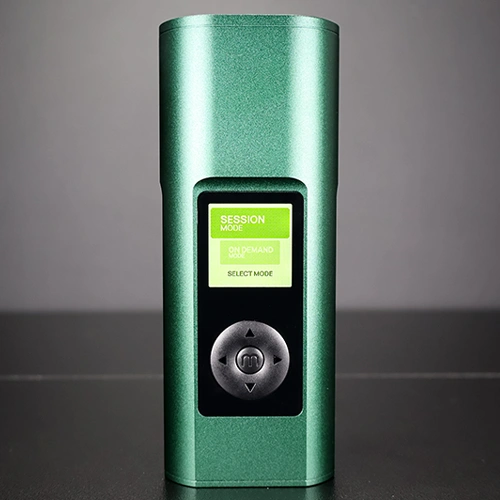
The device has very little branding and no logos. In fact, there is only one “A” logo representing Arizer on the heating chamber cap. The front of the device has a small square screen, with the buttons located just below it. The back of the device has a sun-shaped airflow hole near the top and a USB-C charging port near the bottom. The Arizer Solo 3 does not have adjustable airflow. On both sides of the device, the edges are squared off, which gives a nice place to rest your hand comfortably.
The aluminum body feels great to hold. It is a little on the heavier side but nothing too crazy. The buttons feel sturdy and of high quality. They are also very responsive when pressed.
At the top of the device, you will see the heating chamber cap. Removing this cap will expose the heating chamber. The chamber can hold up to 0.5g of material; however, the device itself does not hold the material.
The Arizer Solo uses glass aroma tubes that you fill with your favorite dry herb, then place inside the device. The standard-size glass tubes hold up to 0.1 g of material, while the XL glass tubes can hold up to 0.3 g of material. Due to the hybrid heating system, there needs to be enough room for the convection heating to be effective; hence the 0.5g chamber size.
Using the mouthpiece is an interesting experience and different from anything I have ever used before. Unlike most portable vaporizers that come with a plastic, metal, or ceramic mouthpiece, glass was new to me. Since it is a glass mouthpiece, I feared it would get too hot, but it stays cool to the touch during use.
The battery in the Arizer Solo III V2 is a massive 5000mAh capacity. Using the included charging cable and plug, you can recharge in about 90 minutes. The Solo 3 also supports pass-through charging, so there is basically no downtime.
Portability
As previously mentioned, portability is a tricky one here. The device is portable, but to an extent. You can take it out of the house with you; however, the mouthpiece is entirely glass, and I wouldn’t want to trust the exposed mouthpiece while out on the town. I also think the device is a little too large for any type of concealed or covert use.
So yes, the device is large, bulky, and even quite fragile, but if you dismantle and secure all the pieces, such as by placing the glass mouthpiece back into the included tubes, you can take it with you. And if you do plan to travel, I would take a secondary backup glass tube with you in case one breaks. Thankfully, there are a total of four glass tubes included in the box.
The device’s weight will also affect travel. While it isn’t impossible, you’re going to want to have some sort of bag to carry it in.
Features
The Solo 3 has some incredible features that elevate this device beyond the average dry herb vaporizer. Normally, you get a dry herb vaporizer that delivers vapor through a mouthpiece, or you get one that can be used with a water bubbler. The Arizer Solo 3 does both!
One of the most important features of a dry herb vaporizer is its temperature output. The Solo 3 has a maximum temperature output of 428°F/220°C. This is comparable to the Davinci IQ3 and other top-end vapes. Reaching your desired temperature takes anywhere from 10 to 15 seconds, depending on the mode you are using and the temperature you have set, which is very fast.
This device uses an 80% convection and 20% conduction heating method. The conduction heating heats up the material in direct contact with the oven, while the convection heating heats the material via hot air, so it’s recommended to leave space when loading the glass tubes to allow proper airflow.
The Arizer Solo 3 comes with a set of accessories that lets you use the device right out of the box without buying anything extra. Included are 2 glass aroma tubes, one standard size and one XL size. There are also two frosted glass tubes (to be used with a water bubbler), one standard size and one XL size. A stainless steel stirring tool and a cleaning brush are also included.
Finally, travel tubes are included to secure your glass tubes on the go.
Custom Settings
Holding the right button lets you access the device settings. Then, using the left and right buttons, you can navigate through the settings.
Press the M button to select a setting. Once in the selected setting, use the up and down buttons, then press the M button again to confirm.
In Custom Settings, you can switch the temperature unit between Celsius and Fahrenheit, adjust the notification and volume settings, and adjust the display brightness.
The screen can invert (for when you turn the device upside down to insert it into a bubbler), but there is an option to turn that off if you aren’t going to use it.
The Solo III features a device lock feature that can be turned on or off. The device also turns off after a set number of minutes or seconds, depending on which mode you’re using, and this auto-off setting can be adjusted here as well.
How to use the Arizer Solo 3 V2
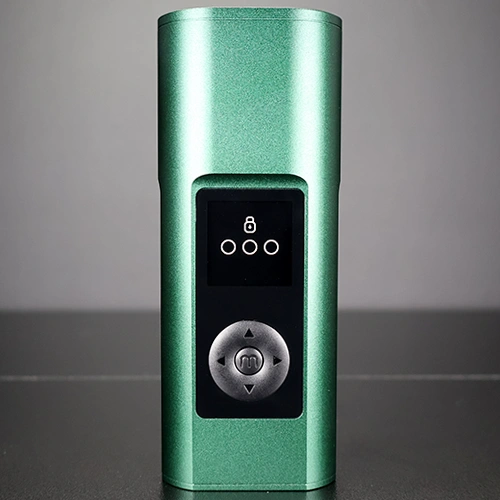
The Arizer Solo 3 requires a bit of patience and some time to get familiar with the device, as it’s fairly complex and not that straightforward to use at first. I suggest reading the user manual in full to get the most out of your experience, and keeping the manual handy for your first few times using the device.
There are a total of five control buttons; they are:
- ⓜ: Press to select
- Double-press for preset selection
- Hold to power on or off
- ⇧: Press to increase temperature by 1°
- Hold to increase temperature by 10°
- ⇩: Press to decrease temperature by 1°
- Hold to decrease temperature by 10°
- ⇦: Press for settings/presets
- Double-press to go back to previous preset
- Hold for mode select
- ⇨: Press for settings/presets
- Double-press for next preset
- Hold for settings
When you read the manual, you will see that each button has multiple uses depending on the setting or mode you are currently in. There are also settings you can change while you are in the middle of a session. For simplicity, I have omitted some of the uses. As you can see, it will take some practice to master this, but with time, it will eventually click.
Modes
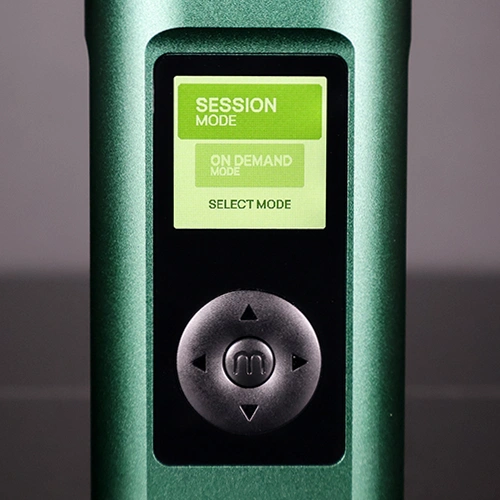
As I mentioned previously, there are two ways to enjoy the Solo 3: Session mode and On Demand mode.
To select between Session mode and On Demand mode, first turn on your device. This will display the two options; press the up and down buttons to choose between the two. When you choose a mode, press the M button to select it. You can switch between modes at any time by pressing the left button.
Now, each mode serves a particular purpose. If you are planning to use the device by itself, you will want to use the Session mode. If you want quick rips using a water bubbler, the On-demand mode serves this best.
Session Mode
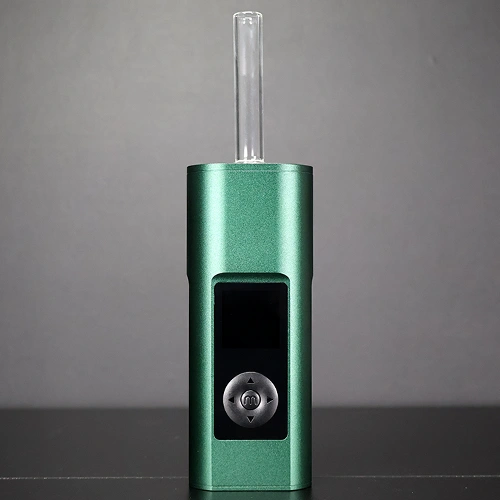
For those of you who are looking to sit back, relax, and enjoy a long session, Session mode is for you. This session is best used with the clear all-glass mouthpieces. You can adjust the temperature by 1° by pressing the up or down button once, or by 10° by pressing and holding the up or down button.
As the device heats up, you will notice a semicircular gauge that informs you what temperature your device is at and when it is heated up. The black bar represents the set temperature, the green represents the current temperature, and the blue bar represents the temperature cooling down.
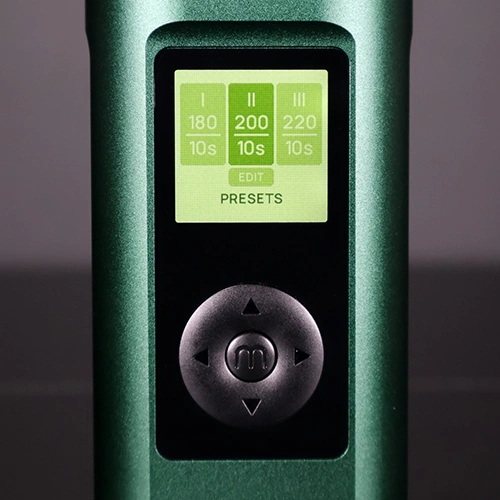
Session mode has three presets. To select a preset, press the M button twice. This will take you to the preset menu. Use the left and right buttons to select a preset. By default, the presets are 180°, 200°, and 220°. However, these can be edited to your desired temperatures. To edit a preset, select the edit option below the presets, then use the up and down buttons to set your desired temperature.
The session mode has a default session time of 10 minutes, but this can be changed in the auto off settings.
On-Demand Mode
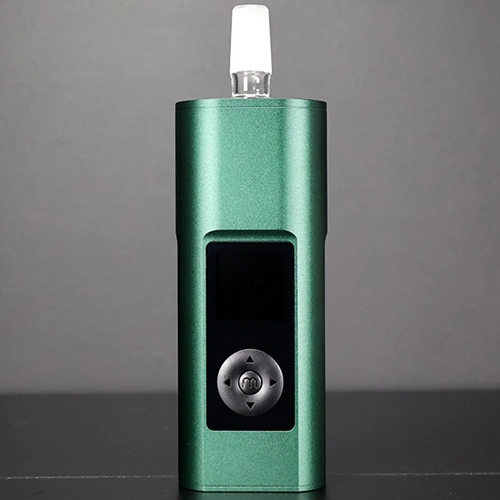
The On-Demand mode is designed for use with a water bubbler and delivers quick, powerful rips. The On-Demand mode display is a little different and does not feature a gauge like Session mode. Instead, there are seven bars that light up to keep you informed. Before starting a hit, the bars will be gray.
To begin heating, press the up button. During heat-up, the bars will turn green from the bottom up. Once the set temperature is reached, all the bars will be green. The bars will begin to turn gray when cooling down. To cancel heating, press the down button.
The default heat time is set to 10 seconds, but this can be changed to anywhere between 5 and 20 seconds. To adjust this setting, go to the auto-off settings.
The On-Demand option also features presets. These presets include a set temperature and heat time. The preset options are:
- 180° / 10 s
- 200° / 10 s
- 220° / 10 s
Double-press the left or right button to switch your preset at any time. Double-press the M button to enter preset selection. Use the left and right buttons to navigate between presets, then press the M button to select one.
To adjust your presets, click the edit button below the setting. Once there, use the left and right buttons to select between the TEMP and HEAT TIME options, and use the up and down buttons to adjust them. To adjust these presets, click the edit option just below the preset.
The Arizer Solo 3 includes a toggle option. This can be used in both session and on-demand modes. To add five minutes to your session, press the M button while the device is in use. Using this option does not affect your auto-off settings.
Aroma Glass Tubes
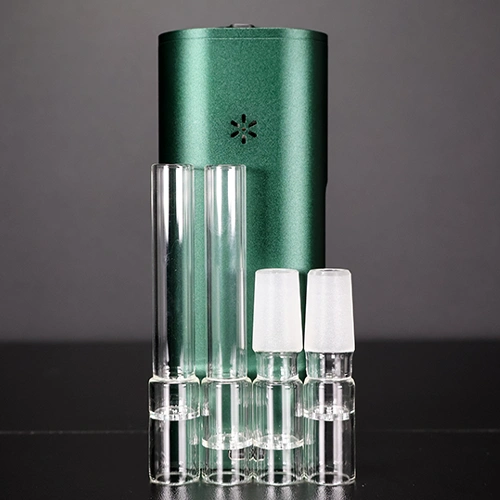
You get a total of four glass tubes included with the Arizer Solo III. Two are for use with a water bubbler, and the other two are to be used as the mouthpiece when using the device by itself. The Arizer is unique in that you load these glass tubes rather than the heating chamber itself.
Standard-size tubes hold up to 0.1g of material, and XL tubes hold up to 0.3g of material. There are four airflow holes in the standard-sized tubes and five airflow holes in the XL tubes.
To load the glass tube, you do not need to use a loading tool. Instead, place your ground-up material in a small container, then gently press the stem into the material using a turning motion to load.
Leave 1-2 mm of space in the tube to allow the material to heat evenly. To ensure there is space, I used a glass poker to level the material. Do not press too hard or pack too tightly, as this will also affect the Solo III’s ability to heat the product evenly. Once you have loaded the glass tube, you can place it into the heating chamber and begin a session.
If you are using a glass water bubbler, turn the device upside down and place the glass stem into the water bong. This will invert the screen.
Battery Life & Charging
The Arizer Solo 3 comes with a massive 5000mAh battery. On a full charge, you can expect around 3 hours of total run time in session mode. This will yield about 18 full sessions before needing a recharge.
If you use the device strictly in on-demand mode, expect around 100 draws before needing a recharge.
The device supports USB-C PD (power delivery) and can be charged in just 90 minutes when using the supplied cable and wall charger. This is extremely fast considering the battery capacity. You can also use the device while charging thanks to the pass-thru charging option.
While battery life will heavily depend on the mode you are in, the temperature you set, and how long your sessions are, battery life was not an issue for me, and I found the Solo III lasted well beyond my expectations.
Performance & Vapor Quality
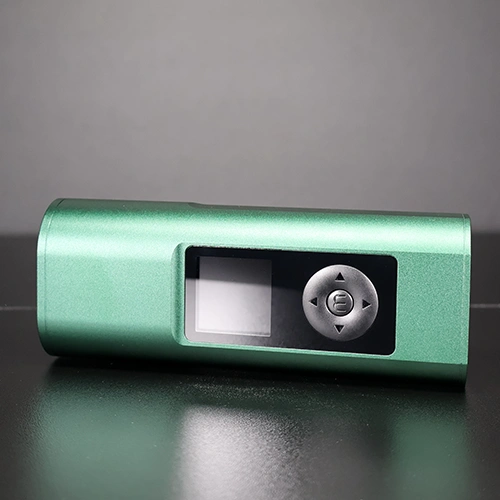
As there are two different modes, you can expect two different experiences when using the Arizer Solo 3. In session mode with the glass aroma tube as the mouthpiece, or using the device paired with a water bubbler, will garner two different results.
For those of you looking for quick sessions and rips, the On-Demand mode will deliver massive amounts of vapor through the water bubbler. This vapor is smoother and cooler than the vapor you get from using the device by itself. I did notice that it took an extra second after the device reached temperature to provide vapor, so be mindful of that. I got a few large pulls from each session.
For users who are looking for longer sessions and just chill out for 10 minutes while sipping on the mouthpiece, you will love Session mode. It took some finessing to get the settings right for me, but I would start at a lower temperature and work your way up. Reason being is that the Solo III heats up fast and you can go through your material in record time if you’re not careful.
The vapor is also quite warm, verging on hot, when sipping directly from the device. If you prefer hotter vapor, you’ll love the experience. If not, experiment around with the temperature setting, or use On-Demand mode with a bubbler for cooler, smoother vapor.
Cleaning & Maintenance
Cleaning the Arizer Solo 3 is straightforward and easy. Simply place the glass aroma tubes in a container of isopropyl alcohol and let them sit for a while. Then rinse them out and let them dry. You can use an alcohol wipe to clean the heating chamber.
To keep your device as clean as possible between cleanings, remove all used material before it cools. Once the material has cooled, it will be harder to remove, and you will notice some gunk buildup. The included brush is great for after-session cleaning.
Verdict
For my first experience with an Arizer product, I have to say it left a very good first impression. The build quality rivals other high-end brands, and the overall fit, finish, and design of the Solo III are top-notch.
All accessories needed for full use are included right in the box, which is a huge plus. While it does take some time to get used to all the modes and settings, it’s worth the time and effort, as you can really use the Solo III how you want for the optimal personal experience.
You can expect excellent vapor with either delivery mode. For faster sessions, the On-Demand mode is perfect and delivers massive vapor, while Session mode is ideal for users who are chilling out and taking their time, although I would suggest starting at lower temperatures to avoid burning your material.
The display screen is very informative once you have figured out what everything means. I love that there are presets in both session and on-demand modes, and that they can be fully adjusted to your desired settings.
I’m a huge fan of how you load this device using the all-glass aroma tubes, as it definitely makes both loading and cleanup a lot easier.
Overall, the Arizer Solo 3 is a great option for both multi-use and single-use users, as it can be used on its own or with a water bubbler. I think that it’s an ideal device for more seasoned users, as someone who is newer to portable vaporizers might be a little overwhelmed by the number of features and settings. But if you spend some time reading the manual and playing around with the device, you’ll get the hang of it eventually.
Highly recommended.

 Adam Alhiraki
 Russ Ware






Add comment