
There are a lot of portable dry herb vaporizers out there. There are also a lot of e-rigs out there. Whichever material you want to use, you’ll have to choose one or the other. Or do you?
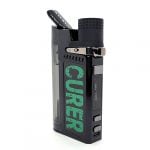
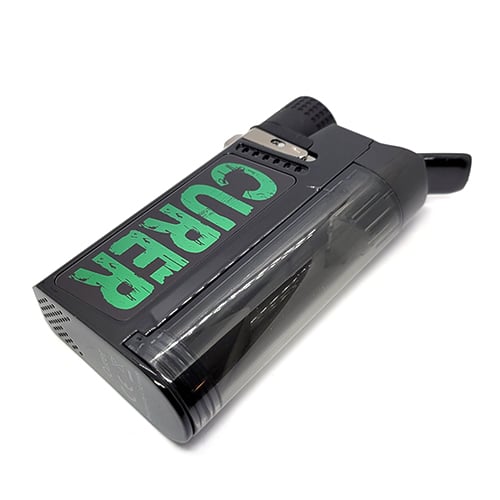
Maybe not, because today I’ve got my hands on the Curer Vaporizer by LTQ Vapor. It’s a portable vaporizer that features a unique 3-in-1 setup that allows you to use either oil, concentrates, or dry herbs just by swapping the coil. It also features a unique water bubbler tank that cools and filters your vapor.
The Curer features wattage adjustment from 5 to 35W, and a temperature range of 140°F to 600°F. It has on-demand heating, an airflow button to increase airflow, a built-in 1500mAh battery, and it charges with Type-C charging.
I’ve been using the Curer for 2 weeks now and I’m ready to give my honest thoughts and opinions. Is it worth purchasing? Find out in this review.
This device was sent to me directly by Vape4Ever for the purpose of this review. This does not in any way affect my thoughts or ratings of the device.
Box Contents
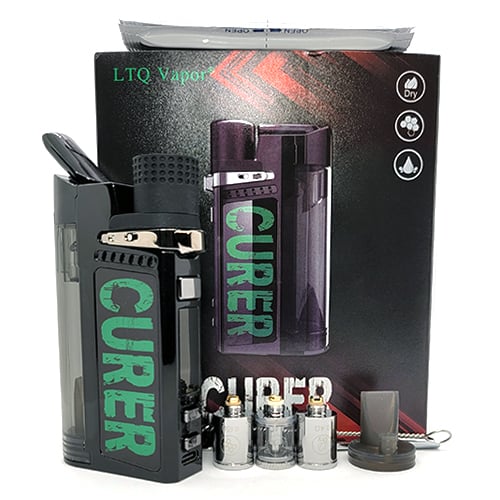
- 1 x Curer Vaporizer
- 1 x 1.4Ω Oil Coil
- 1 x 0.4Ω Dry Herb Coil
- 1 x 0.65Ω Concentrate Coil
- 1 x Dab Tool
- 1 x Cleaning Brush
- 1 x Water Tank Valve Assembly
- 10 x Alcohol Swabs
- 1 x Type-C Cable
- 1 x User Manual
- 6 x Spare O-Rings
Specifications
- Material: PCTG, Zinc Alloy, Silica Gel
- Size: 100.5mm x 55.3mm x 25.1mm
- Wattage Range: 5-35W
- Temperature Range: 140°F – 600°F
- Heat Up Time: 5 Seconds
- For Concentrates, Oil, and Flower
- Dry herb coil: 0.4ohm stainless steel
- Concentrate coil: 0.65ohm Ceramic
- Oil coil: 1.4ohm Quartz
- Unique Water Filter Tank
- On-Demand Heating
- Type-C Charging
Overview

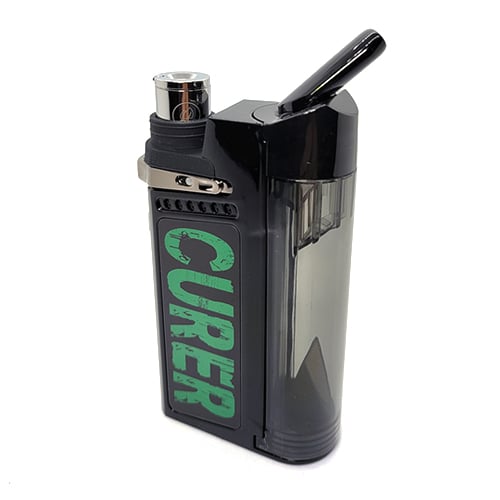
The Curer is a small and portable device that allows you to use whichever type of material you like, whether concentrates, oil, or flower, just by swapping the oven/coil. The unique water filter tank cools and filters vapor for smoother draws all-around. It heats up in only 5 seconds and uses on-demand heating, which means you have to hold the power button to get it started — it does not passively heat up when turned on.
The Curer excels when using oils or concentrates, but struggles a bit to provide decent vapor with flower. It’s still perfectly usable for dry herb, but dedicated dry herb vaporizers perform better. If you use oils or concentrates, this is a great device to have for on-the-go, and even for at home.
Design & Feel
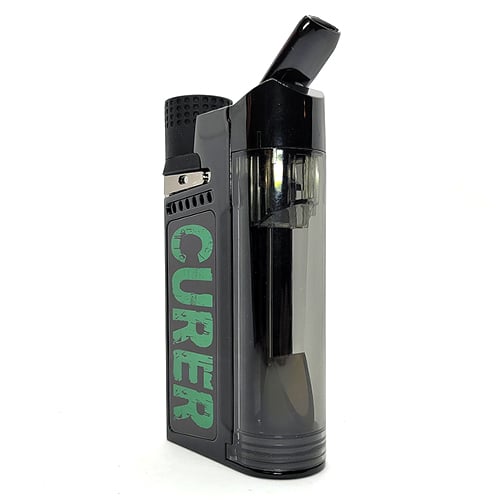
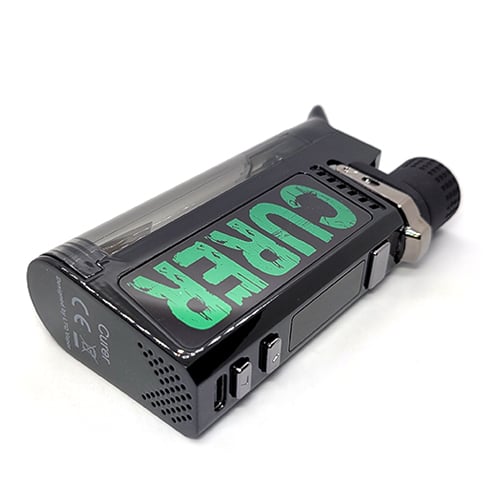
The Curer has a design that is very unique among portable vaporizers. It looks almost industrial, like it’s made for a purpose. It has a glossy black outer shell and each side has a panel with CURER in a big, spooky, green font. It’s a decent looking device, but it’s not going to win any awards for the most beautiful portable vaporizer.
The gloss black outer shell picks up fingerprints like crazy so I’ve found myself wiping it down every chance that I get. Another small issue I have is that the exposed water tank really gives away its purpose; one person asked me if it was a bong! If you’re looking to fly under the radar with your vaping, this might not be the device to use.
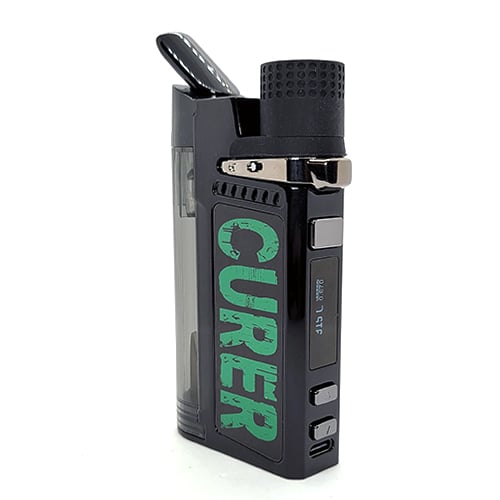
The screen is bright and clear, but it has an old-school feel to it with the UI and black and white display.
The Curer is primarily made out of PCTG, a plastic resin. The water tank, mouthpiece, and most of the vapor path passes through this PCTG before reaching your mouth, which is usually not the best for flavor. We’ll see how this does later in the performance section.
Aside from the design, it’s quite comfortable to use and index firing feels natural. You cannot comfortably thumb fire this device due to the design, with the mouthpiece being on the opposite side of the fire button. The build quality seems to be good, with no imperfections to speak of. All of the components fit well together and the Curer feels solidly built.
Portability
The Curer is not the smallest vaporizer out there, but it’s still quite portable. It’s 100.5mm tall, 55.3mm deep, and 25.1mm wide — not too large at all. It’s easy enough to throw into a pocket and go on about your day. It has some weight to it, and this is made more noticeable with the water tank filled, so you won’t forget that it’s there. However, it’s not going to be a burden where you feel like it’s weighing down your pocket.
Mouthpiece
I really like the mouthpiece because it swivels out from the device and angles up perfectly to meet my lips. Compared to devices where the mouthpiece is sticking straight up and you have to angle the device to draw, this mouthpiece lets you keep the Curer level while still comfortably drawing. When you’re done, you can swivel it back into the device where it’s out of the way.
Water Tank


The Curer has a water tank that serves as a bubbler to cool and smooth out your vapor. It pulls away from the device with a horizontal pull, and reattaches by pushing back in. There is a small nozzle that attaches to the main device and on here is a small o-ring. If you ever find that the fit is loose or leaking, you can replace this o-ring. In the two weeks that I’ve used the Curer, the fit has been perfect and I have not had any issues with the water tank becoming loose.
Filling up the tank is really easy. First you’ll have to remove the tank from the device. Next, the cap, which also has the mouthpiece, comes off with a quarter-turn. There’s a max fill line just about midway up the tank. You want to keep the water level below this line to prevent spit back and leaking, but you also want to keep it above the silicone triangle at the bottom of the tank. It’s a very specific level you have to fill it to, but it works really well.
Coils
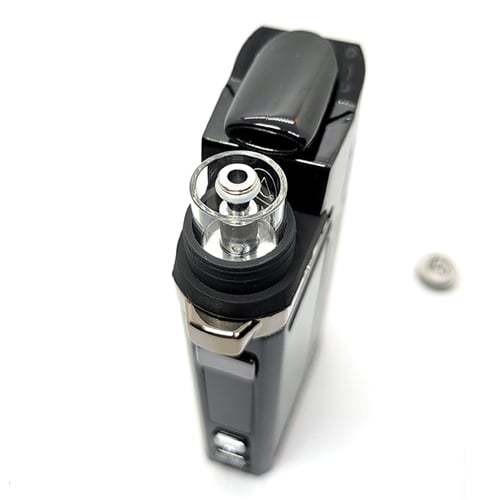
Included in the package are 3 replaceable coils: one dry herb coil (0.4ohm stainless steel), one concentrate coil (0.65ohm ceramic), and one oil coil (1.4ohm quartz). These coils have a 510 thread on the bottom which screws into the 510 thread at the top of the Curer. Each coil has a cap that either swivels open (flower and concentrate coils), or unscrews (oil coil).
Once your coil of choice is installed, make sure that you replace the silicone guard cap around it before using it. The coils get extremely hot, and even with the protective cap on, you can still feel the heat. This guard cap also serves to keep the heat inside of the oven for more efficient performance, so make sure that you use it!
How to Use the Curer
There’s nothing complicated about using the Curer. It’s as straightforward as a device can be, and honestly it functions more similarly to a regular nicotine box mod than to a THC vaporizer. I say this because it uses on-demand heating, where it heats up when you press the button. It does not passively heat when you turn it on like the majority of dry herb vaporizers do.
To turn the device on, press the fire button 5 times. From here you can adjust the wattage from 5-35W. If you want to hop into temperature control mode, you can press the fire button 3 times. The temperature range is from 140°F to 600°F. It defaults in Celsius, but this can be changed by holding the fire button and up adjustment button to toggle to Farenheit.
Before you use the Curer, you’ll want to make sure that the water tank is filled to just below the maximum fill line. You’ll also want to screw in the coil for your material of choice, load the bowl, close the cap, and replace the silicone guard cap around the coil. With all this ready, you’re good to start vaping.
I recommend starting with the wattage at 10W, and working your way up to somewhere where you’re comfortable with the strength and heat of the vapor. Alternatively, you can start at 390°F and work your way up from there. I found that for flower, which typically does well in dry herb vapes from 375°F to 425°F, I had to raise the temperature to 450°F to get decent vapor. I also had to hold the fire button for 10 seconds before pulling to really heat up the herb. For concentrates, 15W or 400°F got a lot of vapor going and was perfect for me. No manual preheat needed for concentrates.
I just recommend experimenting and finding your preferred temperature or wattage for each type of material. This device with the on demand heating works differently from other passive heating vaporizers so it will take some trial and error to find what works for you, but hopefully my findings above give you a good place to start.
Performance & Vapor Quality
Although the Curer is made primarily out of PCTG, with the last 80% of the vapor path passing through this material in the water tank and then the mouthpiece, the performance and vapor quality are actually quite good when using concentrates. 400°F turned out to be the perfect temperature for the wax that I used, and I got a lot of vapor and a lot of flavor. The water tank really cools down and filters the vapor, resulting in a very smooth draw.
This is great in the moment, but you have to be careful. Because the draw isn’t very harsh at all thanks to the water cooling, the effects can really creep up on you. Don’t overdo it with concentrates in this device!
Oils also work well in the Curer, although I only used them once in this device. I’m just a bigger fan of wax and dry herb. Anyhow, quartz coil does a great job of vaporizing oil and similar to the concentrates coil, delivers a lot of flavor and vapor. I found the flavor from this coil to be even cleaner and crisper than the concentrates coil and that’s good news if you like using oil.
Last and perhaps least, is the dry herb coil. While I found that it performed decently, it’s not as good as I expected. I had to ramp up the temperature to 450°F before I really started getting any decent amount of vapor, and this is much higher than I would ever usually vape dry herb. 420° is usually the limit, but this device needed more to even begin to decently extract the herb. Also, I had to hold the power button for 10 seconds before drawing to get it heated up sufficiently, as there is no passive heating. I find the Curer is good for small sessions with dry herbs, and those times where you don’t want to vape a whole bowl, but for extended sessions or for someone who exclusively vapes dry herb, I don’t think this is the device for you.
Airflow
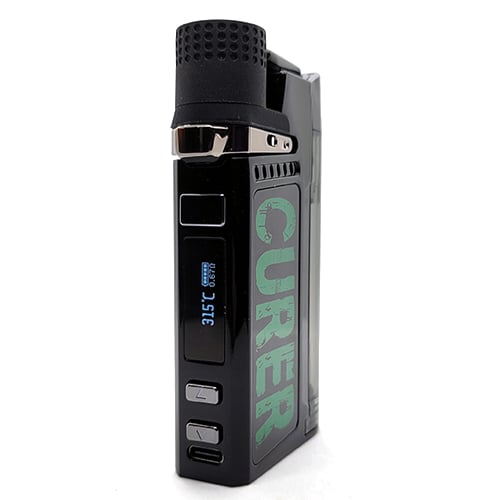
The Curer provides a tight draw off the bat, and this gets even tighter if you densely pack the dry herb oven. It takes a little bit of effort to get the vapor going, but the draw is nice. For a more airy draw, you can press the airflow supplement switch located just below the coil and above the fire button. This will open up the airflow quite a bit and make the draw a lot less tight.
It’s a little awkward to hold the airflow switch and fire at the same time because you’ll have to switch to your middle finger for firing and use your index to press the switch. It would have been nice if the switch would stay where you set it, rather than being spring loaded.
Battery Life & Charging
The Curer has a 1500mAh battery built-in to the device. I managed to get 4-5 good, lengthy sessions out of each charge depending on how high I had the temperature set and what type of material I was using. This makes the Curer great for taking out on the go for the day. Charging time is not too bad either, coming in at just under an hour for a full charge using a Type-C charging cable.
Cleaning & Maintenance
Cleaning is important to keeping any vaporizer running efficiently, and I would say it’s even more important with the Curer. Because it uses a water tank, you’ll want to change the water often to keep any impurities from building up. I also recommend cleaning out the tank at least once a week if you use the device often. This can be done by flipping up the metal handle at the bottom of the water tank and pulling it out. This gives you access to the tank, which you can clean with the included brush and rise out with warm water and soap.
I also recommend cleaning the little pathway near the top of the device, where the airflow from the coil feeds into the water tank. This will ensure that the airflow remains smooth and obstruction-free.
The coils are less of an issue for cleaning because they can be replaced at any time by purchasing replacements. However, if you want to get the most life out of your coils, I recommend giving these a good cleaning when you’re done with the material that you’ve loaded up. The dry herb coil especially, I recommend emptying out the chamber when you’re done a session, and cleaning the oven with one of the included alcohol swabs at least once a week.
Verdict
Ever heard of that saying “Jack of all trades, master of none”? Well, the Curer is a little better than that, excelling with concentrates and oil, but doing just decently with flower. It takes a long time to ramp up enough heat for dry herb, and even then you have to run a higher temperature for not all that much vapor. Concentrates are definitely where it’s at with the Curer, and it works great as a portable e-rig. The convenience of the replaceable coils is just unmatched.
The water tank on the Curer is another great feature. I love how it cools the vapor and makes draws much smoother. While being a 3-in-1 device is certainly a selling point, I think that the water tank is what really sets the Curer apart from other portable vaporizers.
There are a few cons to the device, like the lack of passive heating, the awkward airflow switch, and as I mentioned, the dry herb performance, but if you’re someone who mainly uses concentrates or oils, the Curer is going to meet and even exceed your expectations. For concentrate and oil users, even those who sometimes want to vape dry herbs, I highly recommend the Curer. For mainly dry herb vapers, you’re better off with a dedicated dry herb device.


Add comment