Vandy Vape Kylin M AIO
8.7
PROS
- Great flavour on the second pre-built coil.
- Love the size and weight of device
- Build quality is spot on
- Comfortable to hold
- Really nice airflow
- Excellent amount of extras included
- Easy to build on the RTA pod
- Steel rods have kept up with wicking
- External 18650 battery
CONS
- First pre-built coil was poor quality
- Can be difficult to see airflow adjustments on pre-built coil pod
- Large Kylin logo is not going to be to everyone’s taste
The Kylin M is an all-in-one pod kit from Vandy Vape. It continues the Kylin line after the Kylin, Kylin M, Kylin Mini and Kylin V2 RTA’s. The interesting thing with the Kylin M AIO is that it offers both a pre-built coil pod and a rebuildable pod out of the box, and the rebuildable pod allows you to use both mesh strips or wrapped coils. Add to this an external 18650 battery and it sounds like a complete package on paper.
So does the Kylin M AIO kit deliver? Let’s find out.
Box Contents
- 1 x Kylin M AIO Device
- 1 x Kylin M AIO DIY Pod (5ml)
- 1 x Kylin M AIO Pod (2.5ml)
- 2 x Kylin M AIO Coil 0.3ohm
- 1 x Triple Fused Clapton Coil 0.23ohm
- 1 x A1 M Coil 0.2ohm
- 1 x SS316L M Coil 0.15ohm
- 1 x Dual M Coil 0.15ohm
- 1 x Ni80 M Coil 0.15ohm
- 1 x M wire rod
- 1 x Lead Guide
- 2 x Cotton Lace
- 1 x Accessory Bag
- 5 x Steel Wires
- 1 x Wire Heating Tool
- 1 x USB C Cable
Specifications
- Power Range: 5-70W
- Output Voltage:0.5-5.5V
- Size: 101mm x 47mm x 25mm
- Operating Voltage: 3.2-4.2V
- Operating Mode: VW/VV/TCSS
- Waterproof PCBA (chip is waterproof – device is not)
Design & Build Quality
So my first impressions on the kit before even opening the box is the sheer amount of extras that are included. Granted, for an AIO pod kit, it is on the more expensive side. However, I like to see a kit coming with everything bundled together and am happy to pay more for the whole package. In my opinion it beats having to purchase extras or add ons for promised features that don’t deliver out of the box, or at some later date.
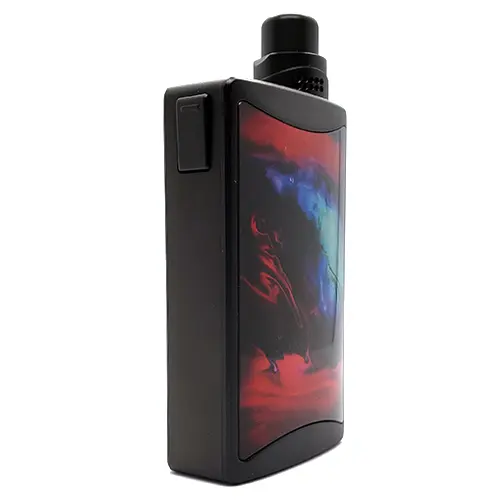
The Kylin M is available in four colours / designs: Wormhole, Fantasy Forest, Silver Moonlight and Polar Phantom. I think a photo of the designs will give a better idea. I opted for the Wormhole colour.
The device itself is of the Billet Box style. It is a rectangular box shape with your mouthpiece on top. The box itself is approximately 81mm x 47mm x 25mm and the mouthpiece adds an extra 20mm on to the top.
The mouthpiece comprises a 510 resin drip tip and an adjustable airflow ring, and is positioned to one side. The drip tip is very comfortable when in use, having rounded edges around the outside. The airflow control turns smoothly but has a nice restriction to it so it won’t move around when you don’t want it. It can be difficult to see which holes are open or closed when adjusting the airflow, especially on the pre-built coil pod, but I have found as long as you have light shining on the holes it is possible to see when you close holes off.
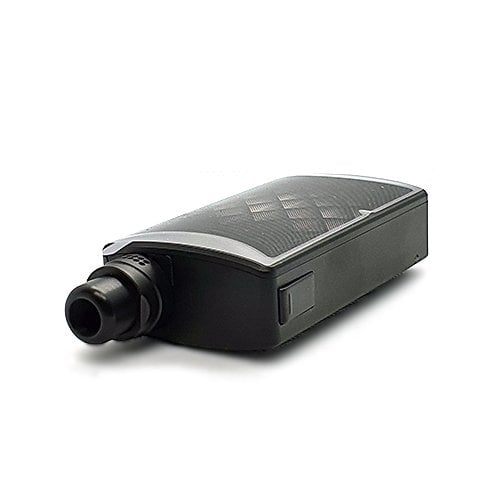
On the back panel you have a large Kylin logo, filling practically the whole panel. It’s not ugly, but I would have preferred a smaller logo and instead had more of the pattern / styling of the chosen colour.
On the front panel is the pattern of your chosen colour. Wormhole is a kind of diamond pattern which fades in from black at the top and fades out to black at the bottom.
On one side of the box you have the fire button, positioned at the top and opposite from the mouthpiece. The fire button is nice and responsive, has a nice click to it when pressed and is very subtly sloped from the top. It’s comfortable to use with either your thumb or forefinger
The other side of the box features a little window to see how much liquid is in the pod. The window is clear, so it enables you to see the level of liquid quite easily and functions well enough.
Underneath you have some battery venting holes and the usual safety and compliance marks.
The device is made out of zinc alloy and feels very sturdy and well made.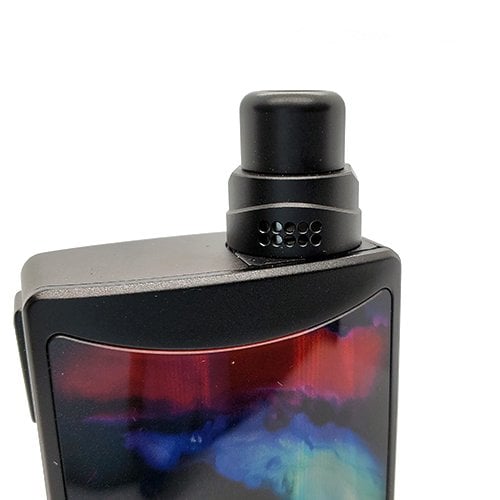
With a battery installed and a pod full of juice I weighed the device and got approximately 212g. It certainly has a nice weight to it for such a small device, doesn’t feel cheap but not too heavy either.
The device overall feels very nice in your hand. I wasn’t expecting it to be so compact, but it feels lovely to hold. It fits perfectly in your hand, has a nice weight to it and feels nice to the touch. The panel with the pattern design on is glossy, but everywhere else has a nice matt finish which is very comfortable to hold.
Removing the front panel reveals the pod, battery compartment, screen and adjustment buttons.
The panel is held on by two magnets, one on the top and one on the bottom. These magnets are very strong and the panel fits perfectly in place, no wiggle at all. I have no worries about the panel coming off in a pocket or bag, the magnets are plenty strong enough.
The battery compartment houses a single 18650 battery. This was one of the big selling points for me. I don’t want internal batteries. I’m more than happy to carry around a spare or two to swap in if needed throughout the day. The battery fits snugly and doesn’t move around once it’s in. There is also a ribbon to remove the battery when you want to take it out to charge or swap for another.
The screen is dinky, but fits all the info you need on there. Battery level, wattage, resistance and voltage when firing. It’s a really bright screen too. The device does black out the screen after a few seconds, which is nice to know you’re not burning battery power on a screen that will spend most of the time beneath the panel.
The adjustment buttons on the inside are two round buttons located beneath the screen. These let you adjust settings up or down and to cycle through the various options. Again, these feel nice to use. They have a nice click to them and don’t rattle around at all.
Beneath the adjustment buttons is the USB port. This is Type-C, which is nice to see.
Features & Functions
The Kylin M AIO has a maximum output of 70W. It features VW mode, VV mode and TC SS. It also has TCR to allow you to change the Temperature Coefficient of Resistance.
You turn the Kylin M AIO on or off with the standard five clicks of the fire button. Pressing the fire button three times allows you to then select your vaping mode from VW, VV or TC SS by using the up and down adjustment buttons and the fire button to confirm.
In VW mode you use the up and down buttons to adjust the output wattage between 5W and 70W.
In VV mode the adjustment buttons will adjust the output voltage between 0.5V and 5.5V.
In TC SS mode the adjustment buttons will adjust the temperature. To adjust the wattage you press the fire button four times then use the adjustment buttons to select your wattage.
Further button combinations:
- Fire button and up button pressed together will lock or unlock the device.
- Fire button and down button will rotate the screen.
- Pressing the up and down buttons together twice will re-read the resistance of the coil.
- Pressing the fire button, up and down buttons together will turn off / on the screen, stealth mode.
- Pressing the up and down buttons together will enter the function menu where you can check and reset vaping time / puff counter, turn on / off vaping time and puff counter display, adjust TCR value and check the software version.
Pods & Coils
Pre-built coil pod
The pod is removed from the device by first removing the magnetic front panel. The pod then pulls out by using the mouthpiece as a lever. It comes out easily but once installed is very snug with no movement at all.
The pod itself is tinted, but is easy enough to view liquid level. It isn’t a very dark tint.
To fill the pod with liquid you pop open the rubber stopper. The rubber stopper itself is secure fitting and I experienced no leaks during use. It seems sturdy enough. This pre-built coil pod will hold 2.5ml of liquid. The fill port is ample enough for bigger nozzles.
The pre-built coils are first screwed on to a detachable contact plate, then pressed into the bottom of the pod. They fit securely and I experienced no leaking at all from the bottom of the pod.
The pod is installed back into the device by first placing the bottom of the pod in then pushing the top of the pod into place.
Rebuildable coil pod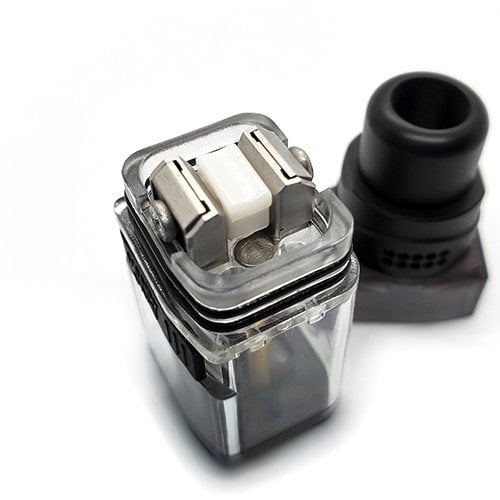
The rebuildable pod allows you to use both mesh strips and standard wrapped coils, the pod will also hold a generous 5ml of liquid. The pod is removed or installed into the device in the same way as the pre-built coil pod. Once removed you pull the top off to access the build deck. The deck itself features two spring loaded clamps to install your mesh strip or wrapped coil. Also the juice is fed up from the tank via four steel rods, which you will need to install first. These just push down through the holes in the base of the build deck.
I’ve never used a mesh rebuildable before, so think it would be unfair to include this portion in the review. Instead I installed the included triple fused clapton which is 0.23ohm.
The coil legs fit one into each clamp and there are slots at each end of the clamps that you’ll see when unscrewing them. This is where your coil legs go, providing a more secure fit for wrapped coils.
I’ve never used a rebuildable tank with the steel rods providing the wicking to the cotton and I have to admit I was sceptical as to whether I would wick it correctly for the capillary action to work.
Once I’d installed the coil, I used the provided tool on the pod to connect the pod without the cap on. This allows you to dry fire the coil, work out any hotspots and remove the pod without needing the cap on.
Once the coil was free from hot spots I wicked it, replaced the cap and installed the pod.
You can pull the whole mouthpiece off (drip tip and airflow ring) to check your build while the pod is installed. You could even drip onto the coil if you wanted to.
Building on the pod was straight forward, it’s not too fiddly or small to work with. Just hope my wicking is ok.
Performance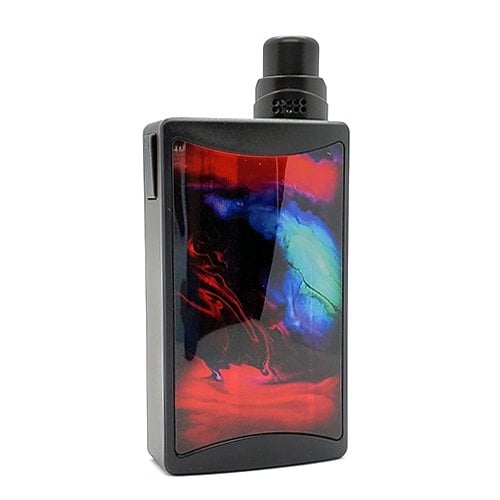
So, how does the Kylin M AIO perform? I first tried the pre-built coil that came installed, which was one of the 0.3ohm coils rated between 35-45W. I primed the coil first with a few dabs of liquid, installed it and filled the pod with liquid. After letting it sit for about 15 mins I started to vape.
Starting with a low wattage of 10W I gradually upped the wattage in 5W increments. At 30W I started to get some ok flavour, 35W started giving dry hits so I didn’t up it any more. This was 70/30 juice so after dropping down to 30W to finish the pod off, I filled with some 50/50 liquid. Same again, dry hits from 35W. Dropped to 30W and after a while more dry hits. I had to drop to 25W to finish the liquid in the pod. Not a good start with this coil, couldn’t even get to the lowest recommended wattage.
Could have been a dud coil as I’m always careful with a new coil so can almost positively say it wasn’t me. On a positive note the airflow is nice and smooth and it gives a nice draw. Hopefully I’ll have better luck with the other coil and rebuildable pod.
Upon removing the coil, it looked fine. There wasn’t any visible burning on the cotton. For some reason it just didn’t seem to be wicking properly. I threw in the other pre-built coil, which is the same 0.3ohm. I’m kind of glad it’s the same coil as it will let me see if the previous was a dud. This time I have taken no chances and let it sit for 30 mins to eliminate me from the equation. If this coil doesn’t wick properly then at least I can say the coils are poor with some certainty.
The second coil was fine. Got it up to 30W and the flavour was much better than the previous coil. 35W and the flavour really started to come through. 40W more flavour again. 45W and the flavour was really nice, a saturated and flavourful vape. Happy with this vape quality. I like a more restricted vape, so have the airflow closed right down, two holes open. Fully open and the flavour is even better, with a good amount of vapour too. I tried the airflow fully closed off and you can still vape it. It’s still not MTL but the flavour is great.
Onto the rebuildable pod. 35W is giving a nice crackle and flavour. Upping to 40W and flavour increases and 45W is giving a really nice flavour and nice warmth. 50W is too hot for me, but it’s still throwing the flavour out. I do prefer a cooler vape and 30W is plenty warm enough for me on the included clapton, with the flavour being nice too.
Wicking wise, I have been tipping the mod upside down after a few draws on the device and you can see bubbles coming into the pod as liquid is transferring to the cotton. As mentioned I haven’t used a RTA with steel rods before but so far everything has been fine, with no dry hits even at the higher wattages.
Verdict
Overall, I’m very pleased with the Kylin M AIO kit. The first pre-built coil was poor quality, which is disappointing, but the second one was banging out the flavour with no dry hits at all.
The rebuildable pod was easy to work with while building and gave me a very nice vaping experience with the included triple fused clapton.
I’ve had no leaking from either pod and the device looks great and feels like a quality piece of kit. The Kylin logo filling the back panel is not going to be to everyone’s taste, I would have preferred more of the design from the front panel or even a plain panel with just a small subtle logo.
The device feels lovely to hold, has a nice weight to it and fits perfectly in a pocket.
The amount of included accessories is very nice. I would rather pay more for all the goodies in one box, rather than buying rebuildable pods separately.
So overall, a very nice AIO kit. I like how you’ve got no distractions as the buttons and screen are hidden away beneath the panel. Once you’ve found your preferred wattage it’s just a case of vaping and that’s it.
Would I recommend the device to others? I’m happy with my purchase and to anyone who wants a compact AIO device to use as an all-day-vape, maybe for work or out and about, I’d definitely recommend the Kylin M AIO. You get all the accessories in the box and have a choice between pre-built coils, mesh rebuildable or wrapped rebuildable coils. This really is an all-in-one kit.







How do you set the temperature control wire coefficient correctly, to the correct number as no details are given regarding the numbers you need to input
Hey Mark,
TCR for the SS316L coil that comes with the Kylin M AIO will be between .00088 and .00092.