

 Danielle Alhiraki
Design & Build Quality
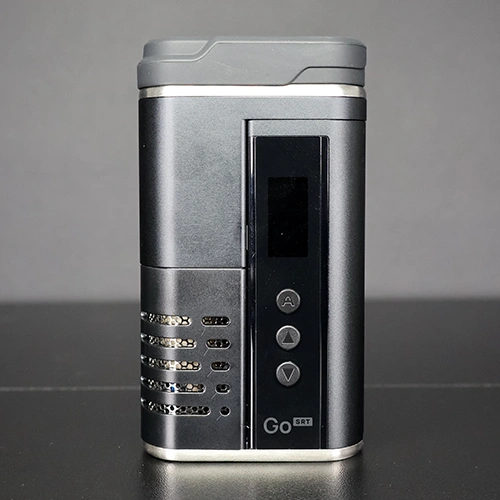
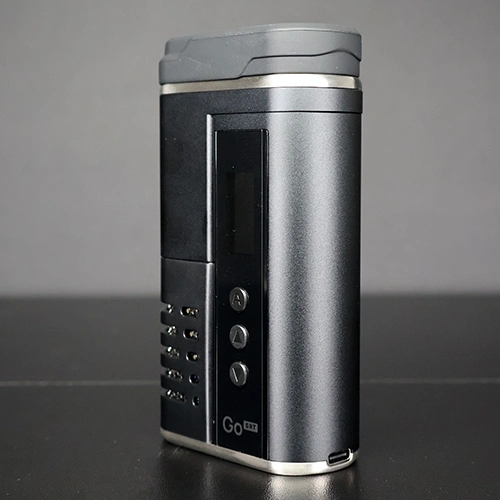
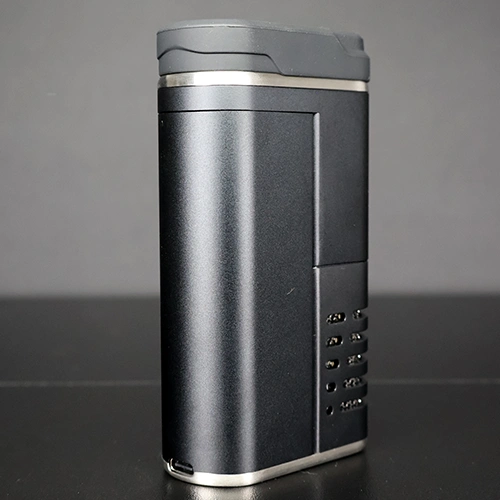
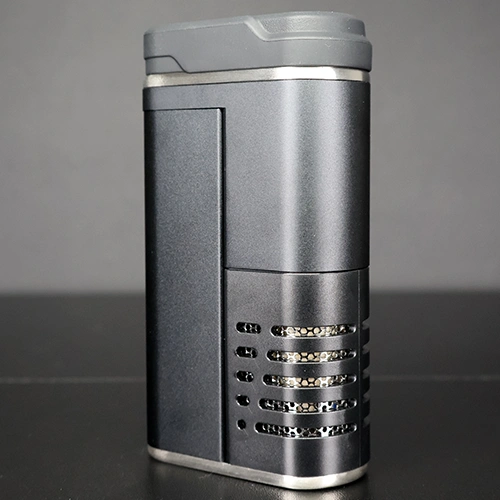
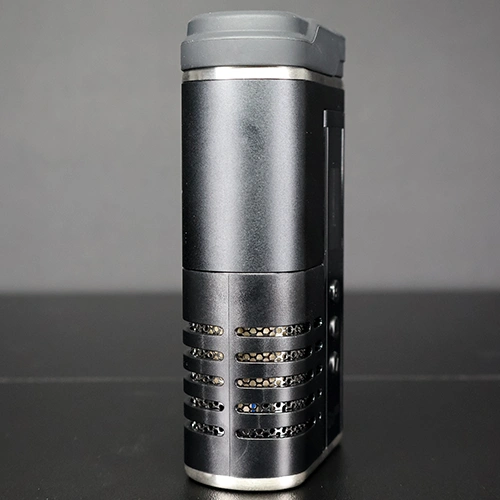
This is the second Arizer device I have used recently, and what stands out is the high-quality finishes and durability of their products. Alongside that, the Arizer Go SRT is designed with portability at the forefront.
The anodized aluminum resists scratches and looks premium. Unlike the Solo 3, the GO SRT doesn’t exactly stay cool to the touch during use. There is a reason for this, though. The Go SRT is designed as a multi-use heater, and you can use it as a hand warmer in the winter.
While this might be a little silly, for a $300 device, it explains the ventilation on the side of the device and why it might feel warm to the touch during use. It does not feel hot, and I didn’t find it to be a problem.
The Arizer Go SRT measures 110mm tall, 60mm wide, and 30mm deep with the mouthpiece and on-the-go cap installed. The device is quite solid at 255g; however, I wouldn’t consider it overly heavy for a dry herb vape.
While Arizer considers the Solo 3 (which I recently reviewed) to be a portable device, I would disagree. I think you need a device that can withstand travel, and the Go SRT is perfectly suited for that. The device’s design, along with the Go operating system, makes this the ideal travel-friendly dry herb vaporizer.
There are a lot of components to this device, so I am going to start from the top and work my way down. The top of the device is made of a silver metal that gives it a nice finished look. You will see a circular hole on one side. This is where the all-glass mouthpiece is inserted.
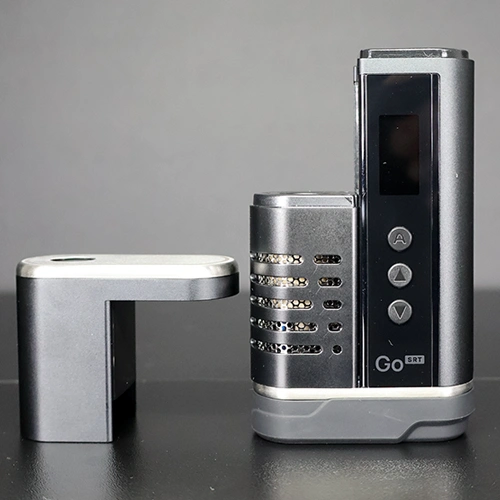
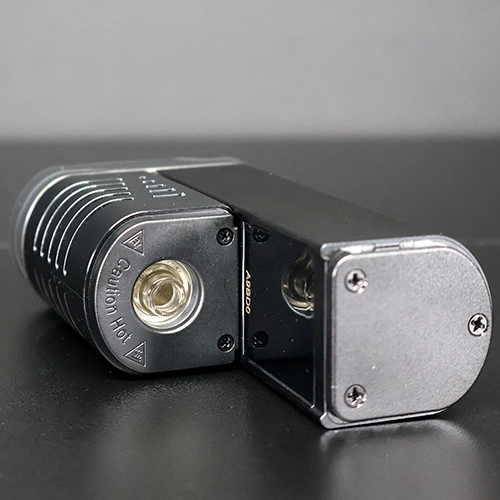
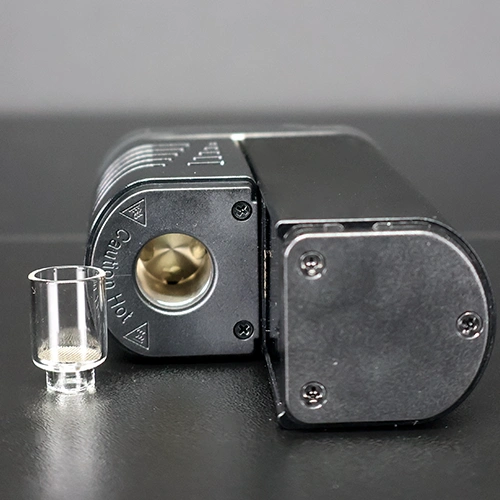
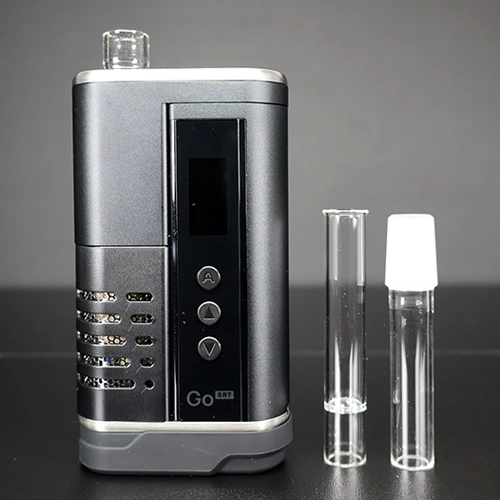
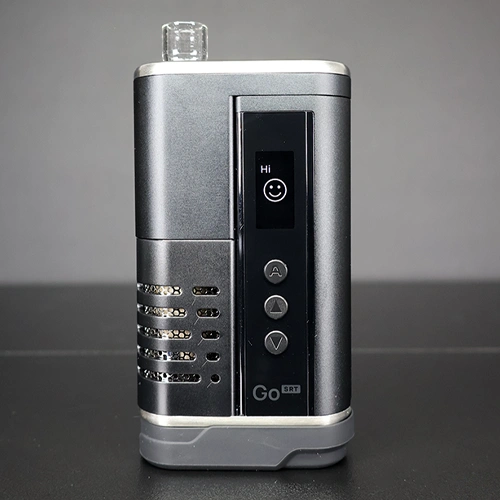
The entire device is made of two pieces. The top comes away from the bottom piece in almost what I can only describe as a Z shape, kind of like how lego pieces go together. When the top is removed, you can see the heating chamber.
While you don’t load your material directly into the heater, there are a few ways to use the Arizer Go SRT. One is that you can use the same aroma glass tube used with the Arizer Solo 3. These tubes are loaded with your material and placed into the device. The tube also serves as a mouthpiece.
The other way to use the Arizer Go SRT is with what they call Go Shells, which are designed specifically for the Go SRT. These glass shells use a filter screen, are filled with material, and then inserted into the device. When using the Go Shells, you will need to insert the all-glass mouthpiece.
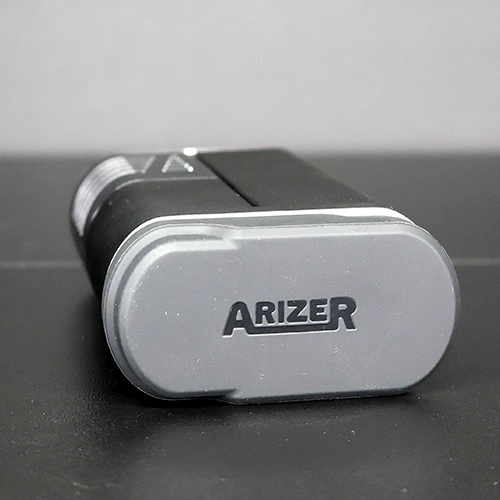
Unlike the Solo 3, this glass mouthpiece is almost entirely encased in the device, with only about 1cm of glass protruding. Arizer thought about everything when it came to traveling with this device, including an on-the-go cap to protect your mouthpiece while on the move. It secures magnetically to the top of the device. The magnets are very strong, and you can be confident it won’t come loose while in your bag. While you are using your device, it magnetically attaches to the bottom of the device. This also acts as a bumper when you place it on a table.
On the front of the device, you will see a display screen and three buttons. The screen is a little on the small side, but it is more than large enough to clearly display all necessary information, kind of (I will explain why this is the case later). The three buttons are sturdy and easy to press.
There is very little branding. The on-the-go cap has an Arizer logo on it, and there is one small Go SRT logo on the front of the device, below the buttons and display screen.
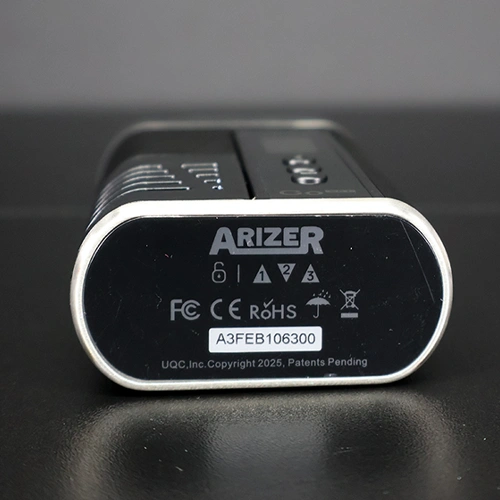
On the side of the device, you can find the charging port, and there is a handy reminder of how to unlock the device on the bottom, just in case you forget.
One thing Arizer does really well is not skimp on battery capacity. The Go SRT features a massive 5000mAh battery. It takes about 2 hours to fully charge. The Go SRT also has an eco battery limit that only charges your battery to 80%. This protects your battery and helps it last longer. You can, of course, turn this off in the settings menu.
Portability
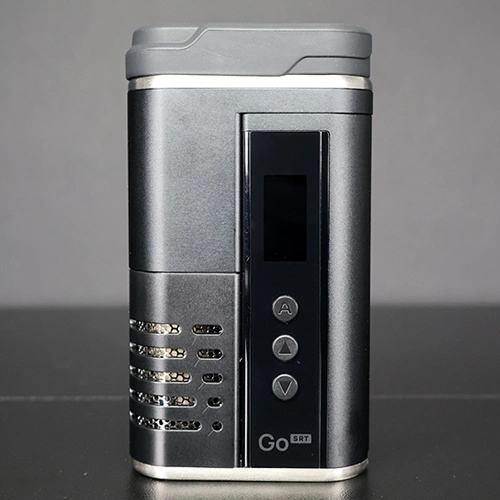
When I hear portable, I assume smallish, not too bulky and not too fragile, right? Well, just because a vaporizer can fit in my hand does not mean it is travel-friendly. But that is not the case with the Arizer Go SRT. Yes, all of the previously mentioned qualities are important for a travel-friendly device, but most of the time we are giving up power if we want portability. The Go SRT says no more. You can truly have the best of both worlds: power and portability.
Arizer has found a way to stay true to their all-glass air pathway while also protecting the glass components. By ensuring that most of the glass components are protected by the device and by adding a silicone on-the-go cap, they have truly made a portable device perfect for travel and on-the-go use.
Along with the Go SRT, there is an entire ecosystem designed to work with it. It includes a grinder, a Go Shell case (which can connect directly to the grinder for easy and quick loading), and the Go Shell travel kit, which you preload and take with you while traveling. I will go into further detail about this ecosystem in the features section below.
Features
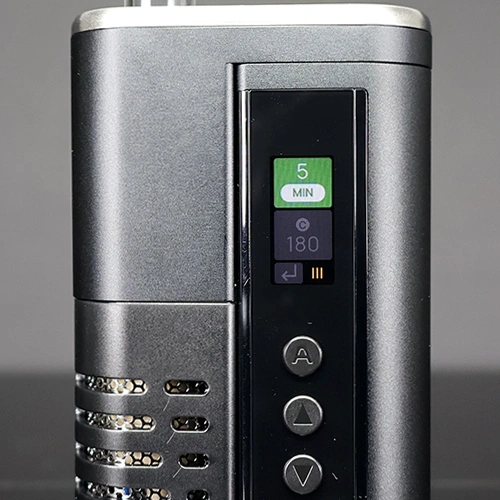
Much like the Arizer Solo 3, the Go SRT can be used by itself with one of the included mouthpiece attachments, or it can be used with a water bubbler. The screen conveniently inverts when flipped and placed in a water bubbler.
When shopping for a new dry herb vaporizer, we want a device that heats up the material quickly and efficiently. Like other high-end vape brands, the Arizer Go SRT reaches a maximum temperature of 428°F/220°C. It takes about 20 seconds to reach the desired temperature.
The Go SRT comes with three presets that you can edit to your desired temperature and session time. The temperature can be set anywhere from 50°C – 220°C (122°F – 428°F). The session time is less forgiving and allows you to choose between 20 seconds, 30 seconds, 1 minute, 2 minutes, or 5 minutes.
The Arizer Go SRT uses 75% convection and 25% conduction heating. Compared to the 80/20 ratio used in the Solo 3, I would say this is the ideal ratio. I didn’t find the Go SRT to burn my material as quickly at higher temperatures, so the 75/25 ratio might just be the sweet spot.
This device comes with a set of accessories that lets you use it right out of the box. Included in the box are two mouthpieces. One is an aroma glass tube that can be preloaded with material and placed into the device. The other is an all-glass mouthpiece used in connection with the Go Shells. These small Go Shells are placed directly into the heating chamber. To use the device with a water bubbler, you can use the included all-glass WPA attachment.
They have also included a cleaning brush, a stainless-steel filter for use with the Go Shell, and a stainless-steel stirring tool. Finally, they have included PVC travel tubes so you can bring your glass accessories with you on the go.
Go SRT Ecosystem
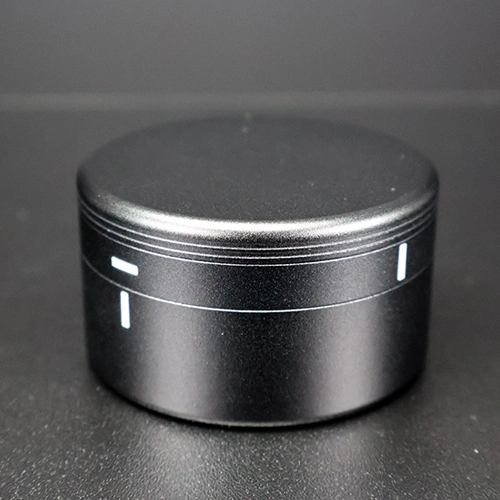
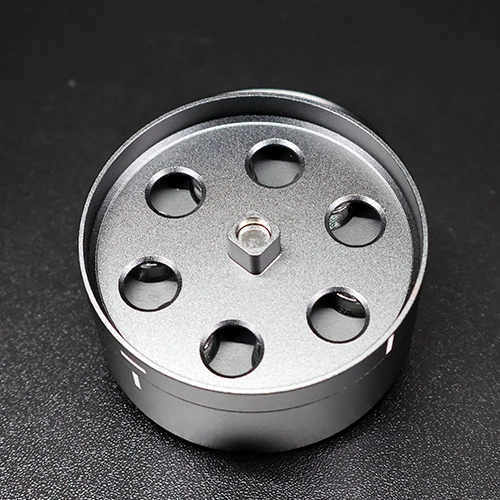
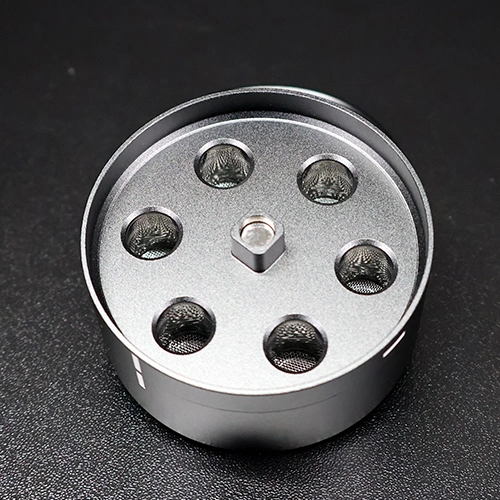
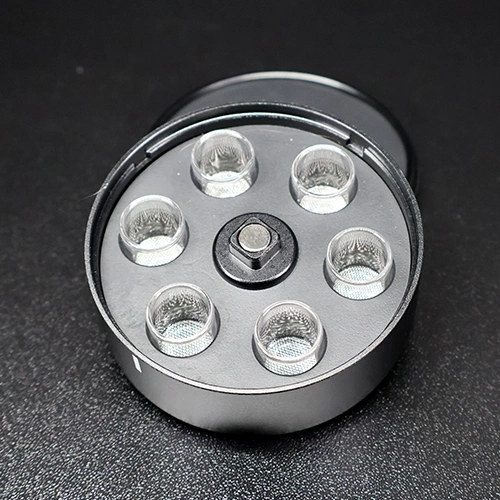
The Arizer Go SRT has been designed for portability and travel. They have also created some interesting accessories that take this device to another level. While getting all of these accessories won’t be cheap, they will definitely elevate your sessions when traveling.
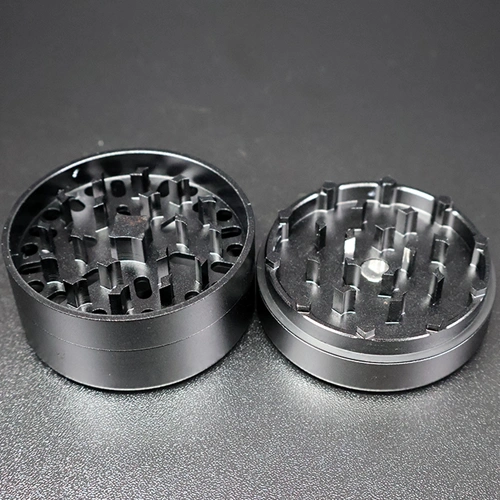
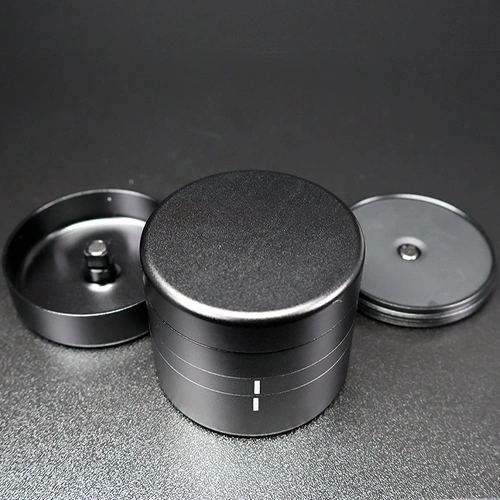
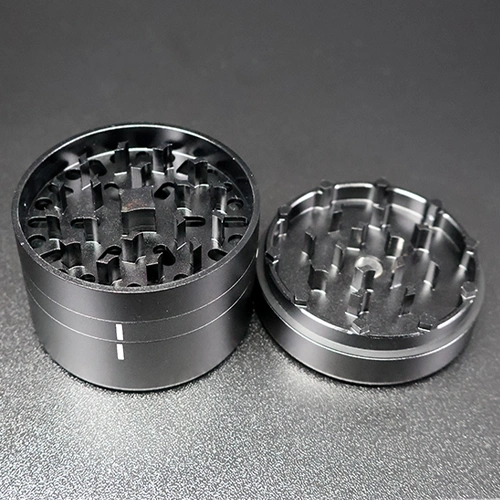
They offer a grinder that can connect directly to the Go Shell Case. This lets you grind your material directly into the glass shells, which are then placed into the heating chamber. Being able to preload six of these shells at once is amazing. They also sent over their Pre-load and Go Case, which holds 10 of these shells, making it ideal for travel. While all of these accessories are incredible, they can be quite costly. The grinder costs around $65 USD, and the Go Shell Case and the Pre-load & Go Case are $100 each.
Custom Settings
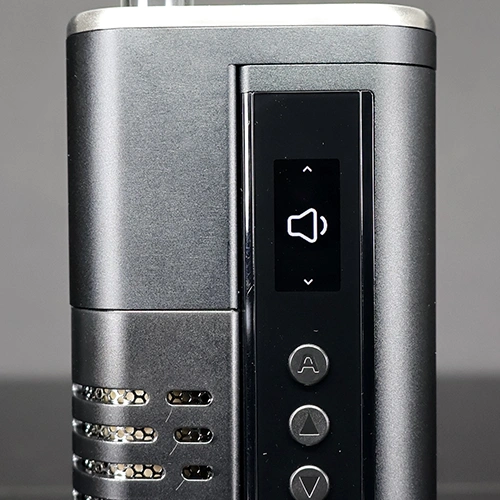
To enter the settings menu, press and hold the down button. Then, using the up and down buttons, you can navigate through the settings.
Press the A button to select a setting. Once in the selected settings, use the up and down buttons, then press the A button to select.
In custom settings, you can switch the temperature between Celsius and Fahrenheit, adjust volume and haptic feedback settings, and adjust the display brightness.
Much like the Solo 3 device, the display screen inverts when flipped upside down and placed in a water bubbler.
If you don’t have small children around or don’t ever want to see the lock screen on your display again, you can turn this off in the settings menu. You can also adjust your auto-off settings in this menu.
How to use the Arizer Go SRT
I did not find the Arizer Go SRT to take as long to get used to as the Solo 3. However, it will still require some patience as you get used to the device. I strongly suggest reading the manual in its entirety and keeping it nearby for your first few sessions.
There are a total of 3 control buttons; they are:
- A: Press once: Start heating, Cancel Heating, Confirm Selection.
- Double press: Enter preset edit.
- Press and hold: On/Off.
- ↑: Press once: Preview and switch presets, up.
- Press and hold: Enter session toggle and battery level.
- ↓: Press once: Preview and switch presets, down.
- Press and hold: Enter device settings.
Each of the buttons serves multiple purposes, so just give it time and it will eventually become second nature.
Modes
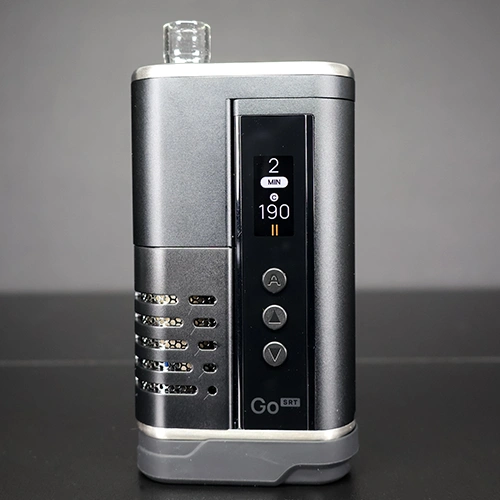
The Arizer Go SRT is more straightforward than the Solo 3. It has only a session mode and does not offer an on-demand mode. To enter a session, first turn on your device. The display will light up with three circles along with a lock symbol on the bottom right, prompting you to unlock the device (to unlock, press the buttons: up, down, up).
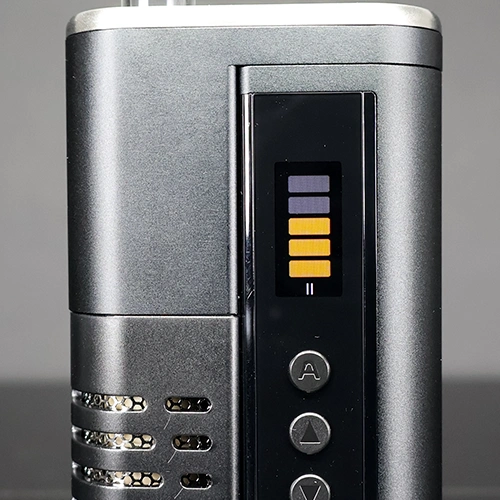
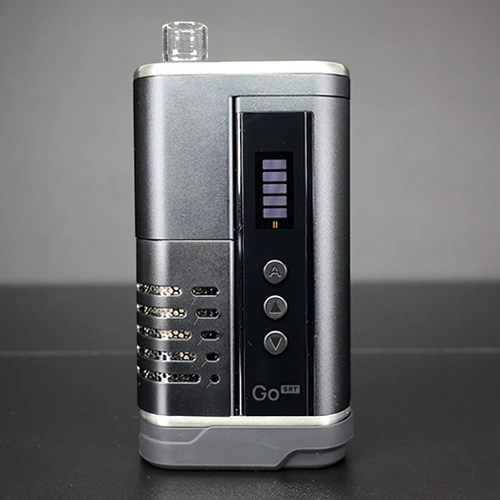
Once you have entered the unlock code, you will see a smiley face on the screen along with the word “hi”. Then the screen will display a total of 5 gray bars along with a Roman numeral at the bottom showing which preset it selected. For example, if you have the first preset selected, you will see the Roman numeral I there. If you have selected the second preset, you will see II at the bottom of the screen, etc.
To switch between the presets, press either the up or down buttons to cycle through the three presets. To select a preset, simply press the A button. To edit an individual preset, double-press the A button to enter the edit options. You will then be able to adjust the temperature and session time.
Once you have selected your desired preset, you can click the A button to begin the session. As the session starts, you will see the gray bars turn orange one by one. This lets you know the device is heating your material. Once the device has reached the desired temperature setting, all the bars will have turned orange. As your session continues, your orange bars will change to gray to show that the heat time is depleting. After this, you will enter the residual heat time, which will last while the gray bars eventually turn white one by one.
To add more time to your session while you are in a session, press and hold the up button to access the toggle settings.
Aroma Glass Tubes & Go Shells
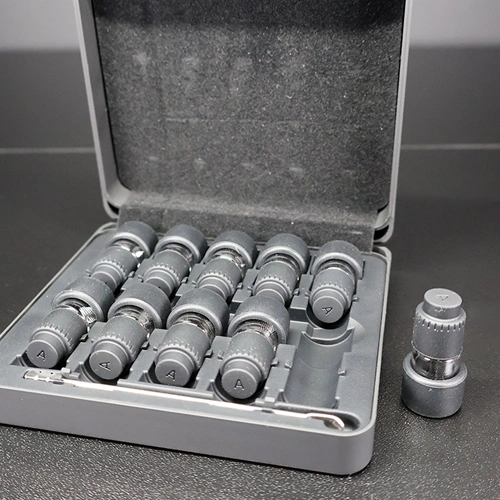
There are a few different ways to load material into the Arizer Go SRT. You don’t load your material directly into the heating chamber. Instead, you load one of the included glass components and place it into the heating chamber.
One of the two ways to use the Go SRT is the same as the Solo 3; using the included Aroma glass tube. This also serves as a mouthpiece and goes directly through the mouthpiece hole and into the heating chamber. To load the Aroma glass tube, simply press it into your material. No extra tools are needed. Then tamp down the material to ensure there is a 1-2mm space to allow the material to heat evenly.
You can also use the Arizer Go SRT with the included Go Shell. This is a much smaller all-glass piece that fits directly into the heating chamber. To load it, use the Go Shell Grip and press the shell into your material. Then tamp it down and leave 1-2 mm of space to allow for even heating.
Next, place your Go Shell upside down into the heating chamber. Then remove the Go Shell Grip by taking the rubber piece and twisting it off. I found the easiest way was to almost act like I was cracking the grip off. Then you can replace the top portion of the device and add the all-glass mouthpiece to the device. It does take a little bit of effort to press the mouthpiece into place, so don’t be afraid to give it a little push. There should be about 1 cm of mouthpiece exposed at the top of the device. If the On-The-Go Cap does not fit securely, the mouthpiece hasn’t been pushed down enough.
If you plan to use the device with a water bubbler, you can use the Go shells and the included WPA all-glass attachment. Follow the instructions above to load the Go Shell into the device, then, instead of attaching the all-glass mouthpiece, place the WPA in the mouthpiece shaft.
Battery Life & Charging
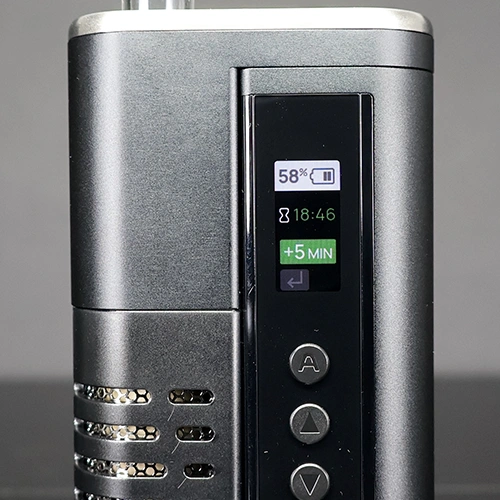
While the Arizer Go SRT comes with a massive 5000mAh battery, it doesn’t last as long as the Solo 3. With the Solo 3, you can expect around 3 hours of run time, depending on your session mode and temperature setting. The Arizer Go SRT can run for only an hour before needing a recharge.
The device can be used while it is charging, thanks to the pass-through charging option. For anyone who may need more time before a recharge, I can only suggest bringing a battery pack with you when traveling with the device.
As I mentioned earlier, the device comes with an 80% battery charge limit. This is to protect your battery and help it last longer. You can turn this off in the settings menu if you prefer.
While it offers less run time than the Solo 3, I found the Go SRT lasted long enough before I needed to recharge. I didn’t really find the shorter run time to be an issue during my testing.
One thing I would like to mention is that due to the display screen’s size, there is no place to display the battery level at all times. On top of that, finding the battery information in the manual was a pain in the butt.
Hidden in the session mode information is how to find your battery level. I found this a little ridiculous. I had to enter the toggle settings to access my battery level. To view your battery, you need to press and hold the up button. This will take you into your toggle settings, which show your battery level percentage, as well as the option to add more time to your session. I would have really liked to see a constant battery level displayed on the screen at all times.
Performance & Vapor Quality
I really feel like the 75/25% hybrid heating might be the sweet spot. I personally found that the Solo 3 would overheat my materials when using higher temperatures. I would sometimes run into toasty flavor. I think that the 5% difference actually made a difference, and I had no issues with any toasty flavor.
While I wouldn’t consider the Arizer Go SRT a cloud-chasers dream, it does deliver clean, warm vapor that is super flavourful. While it may lack in cloud production, it more than makes up for it in portability and excellent flavor.
Like other portable dry herb vaporizers, it will take some finessing with temperatures and session times to find the right one for you. But give it some time and play around with the device until you find the setting that is right for you. I was able to get quite a few sessions on one load before needing to dump my material and reload.
I mostly used the device on its own, but I did try it in my water bubbler a couple of times to see how it fared. In the end, I preferred the device on its own because the vapor was a little warmer. Pairing it with a water bubbler was simple and easy enough, though, and could be a great option for someone looking for a cooler vapor experience.
Cleaning & Maintenance
The Arizer Go SRT is a great device if you despise cleaning and maintaining your device. Your material is not directly loaded into the heating chamber, which makes cleanup much easier than with most devices. This device does not require you to soak your heating chamber.
To clean all the glass components and filters, you can soak them in a container of isopropyl alcohol and let them sit for a while. Then rinse them and let them dry. To clean the heating chamber, you can use an alcohol wipe to remove any residue left behind.
To keep your device and glass components as clean as possible between sessions, remove all used material before it cools. Once the material has cooled, it will be harder to remove and will cause buildup on your shell or tube. After each session, dump your material and use the included brush to wipe out the heating chamber.
Verdict
This device is an on-the-go vaper’s dream. The glass stem is almost entirely concealed within the device, keeping it protected while you’re out. For the exposed portion of the glass mouthpiece, the GO SRT includes a handy cap that completely seals and protects it while traveling.
I like that the cap magnetically connects to the top of the device and provides a secure seal, but when you are using the device, you can conveniently attach it to the bottom of the device.
I also like how well-built Arizer’s devices are. They rival some of the higher-end brands I have used, like Davinci. While I was lucky not to drop the device during use, I am confident that it could take a few small falls and survive.
Everything you need to enjoy the device in its entirety is included in the box. While it has a learning curve and takes a lot of patience, the Go SRT is worth the effort.
The Go Shells are a dream for anyone looking for the perfect portable vaporizer. With the available accessories, this device is seamless and so user-friendly. The ability to use the grinder to grind my herb and load it directly into the Go Shells using the Go Shell Case was game-changing. While these accessories are not required and can be a little on the pricey side, I think they are a worthy investment. You are NOT required to have these accessories to get the most out of your device; however, they do elevate the experience.
Because there are a few different ways to load your material into the device, this also takes some time to get used to. However, once you read the manual and do it a couple of times, it becomes easy.
I really like that you can use the Aroma Glass Tubes or the Go Shells with this device. The Aroma Glass Tubes are super easy to use and require no extra parts. But the option to preload my Go Shells for travel is amazing.
While the display screen is informative and shows you just about everything you could possibly need to see, there is one thing I found irritating, which is that the battery level is not displayed on the screen at all times. I also didn’t like how long it took me to find out how to check the battery level. The instruction manual is one of the most detailed pieces of paper I have read, and for some reason it tells me how to use the device as a hand warmer, but good luck finding your battery level. When I found out I had to enter the toggle session to find the battery level, I was less than impressed. That’s the only real con I have about the entire device.
Overall, if you are looking for a dry herb vaporizer that is durable and truly portable, the Arizer Go SRT deserves a shot. You can have a powerful dry herb vaporizer that delivers warm and excellent vapor, is portable, and is truly made for travel.
Cannot recommend it enough!


 Russ Ware
 Adam Alhiraki







Add comment