Wotofo nexMesh Pro Tank
9.7
PROS
- Top rate flavor
- Massive clouds
- Lots of coil options
- No leaking
- Easy plug n play coils
- Tank looks beautiful
- Good build quality
CONS
- Coils are thirsty
- RBA coil is disapointing
The successor to one of the greatest sub-ohm tanks of all time is here and it’s called the nexMesh Pro. The original nexMesh tank was produced by OFRF, but they’ve since been acquired by Wotofo. So rather than OFRF, this is the Wotofo nexMesh Pro Tank.
Regardless of the acquisition, the nexMesh Pro sticks with the features that made the original nexMesh such a good tank such as the availability of conical mesh coils that concentrate the vapor, and a maximum 6ml tank capacity (depending on which coil you use).
Of course, the nexMesh Pro also brings some upgrades and new features to the table like clapton mesh coils, dual core coils with both mesh and round wire, and an RBA deck.
I reviewed the original nexMesh tank last year and it was downright amazing. Even to this day, the original nexMesh remains the best sub ohm tank that you can get. Wotofo obviously thinks that there’s room for improvement though, so I’m excited to see if the new nexMesh Pro can outdo its predecessor. The bar is set quite high — can the nexMesh Pro raise it?
Box Contents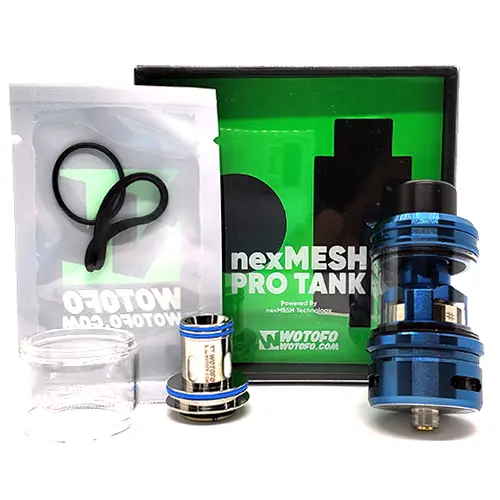
- 1 x nexMESH Pro Tank
- 1 x H12 0.20ohm Clapton Mesh Coil
- 1 x H15 0.15ohm Single Mesh & Parallel Coil
- 1 x Bubble Glass Tube (6ml Max Capacity)
- 1 x Pack of Replacement O Rings
- 1 x User Manual
Specifications
- Diameter: 24mm
- Height: 42.85mm (without drip tip & 510 pin)
- Weight: 73g
- 6ml Max Capacity
- 810 Delrin Drip Tip
- Top-Filled
- Triple Slot, Adjustable Bottom Airflow
- Multiple Coil Options Available
Design & Build Quality
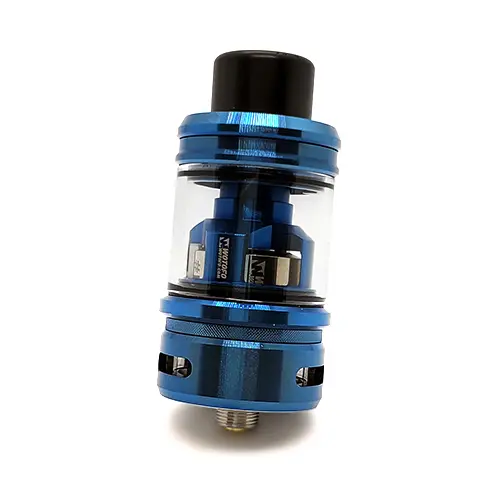
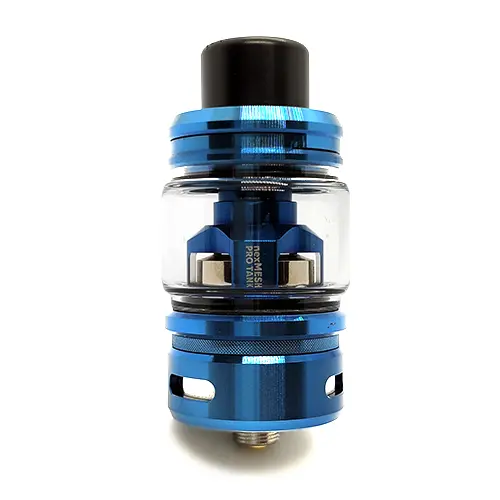
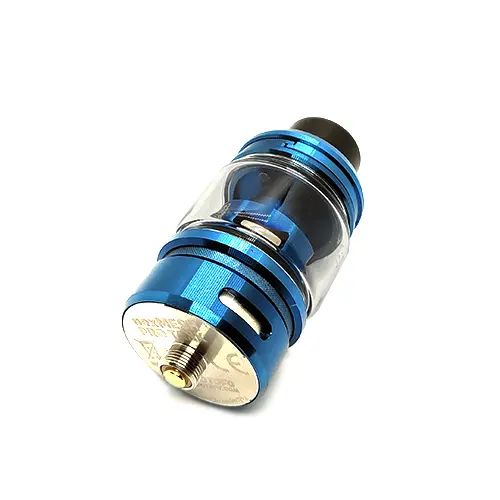
If you just give the nexMesh Pro a quick look, you might mistake it for the original nexMesh. And I wouldn’t blame you; the two tanks look nearly identical, aside from a couple of very minor cosmetic changes. I always liked how the original nexMesh looks, so I’m glad that Wotofo kept the same general design. The entire tank is accurately machined and precisely fit together.
The nexMesh Pro has a slightly smaller base diameter than its predecessor at 24mm vs the 25mm base diameter of the original nexMesh. However, it’s slightly taller at 42.85mm vs 40.5mm. Not a very big difference but it’s noticeable when you put the two tanks next to each other. The nexMesh Pro is still a good sized tank and not at all what I would call tall.
All of the components on the nexMesh Pro are beveled which gives it a clean and neat look. There’s beveling on the top cap, on the metal lip underneath the glass, and on the airflow control ring as well. There are more ‘lips’ on the nexMesh Pro than there were on the original nexMesh and I think that it makes the tank look more modern and refined.
In addition to the beveled edges, there’s also a cross-stitched portion of metal just above the airflow control ring. This is purely for cosmetic purposes as it’s recessed in and separated from the AFC.
On the chimney cage there’s some small branding; a ‘WOTOFO’ logo and a ‘nexMesh Pro Tank’ logo. Other than that, there’s no other branding on the tank. The chimney cage is wide in order to accommodate the huge coils that this tank uses, but it narrows considerably where the chimney meets the top of the tank. This sticks to the design of the original and should help condense and concentrate vapor, which in turn should concentrate flavor.
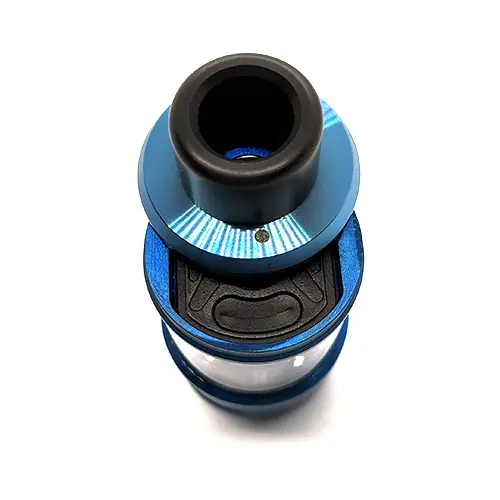
The drip tip is 810 sized and made of delrin. The opening is rounded off to make it more comfortable to use. Because it’s made of delrin it stays cool even when the wattage is cranked up and I’m chain vaping.
The fill cap is a slide to fill system. There’s a small black dot on the top of the cap that indicates where to push it back. The fill port is lined with a silicone guard and features a slit that you have to push your ejuice bottle into. There’s also an air release hole that you can see through the drip tip when you slide the cap back. The fill cap takes a good amount of pressure to push back and the resistance is perfect. Filling up and filling fast is also not an issue thanks to the air release hole.
Out of the box the nexMesh Pro comes with a 4.5ml straight glass installed. In the box you get a 6ml bubble glass. The straight glass is made of PCTG which is super durable and can withstand some serious impacts without breaking. The bubble glass on the other hand is not PCTG, so you’ll have to be more careful about dropping it.
NOTE: The 4.5ml max capacity of the straight glass and 6ml max capacity of the bubble glass are only possible when using single coils. If you use a dual coil like the #H15 the capacity is 1ml less (3.5ml with the straight glass and 5ml with the bubble glass).
Coils
The nexMesh Pro uses the same plug and play coil system as the original. Changing coils is extremely easy. Unscrew the base of the tank to reveal the coil. Now you can just pull the old coil out and push your new coil in (make sure you prime your new coil first!)
The coils for the nexMesh Pro are massive. They have a huge base diameter with a smaller, but still big, core with cotton and wire. There are currently four coils available and an RBA head. I had some of the original nexMesh tank coils laying around so I tested if they would fit; they do not.
The nexMesh Pro comes with two coils inside the package:
- 1 x H12 0.20ohm Clapton Mesh Coil
- 1 x H15 0.15ohm Single Mesh & Parallel Coil
Neither of these two coils are conical and that’s worrisome to me. The conical shape of the coils is what made the original nexMesh such a good tank so it’s strange that they wouldn’t include conical coils in the package. You can buy two different conical coils separately, but that’s besides the point — Wotofo should have included at least one conical coil in the box.
The H12 is a clapton mesh coil, similar to the one on the Augvape Intake sub-ohm tank. It has a resistance of 0.20ohm and it’s rated for 55-75W. This coil uses kanthal A1 as the core wire, and ni80 as the outer, wrapping wire.
The H15 is a new concept for a coil. It’s a dual coil, but with a single mesh core and a double wire regular coil. Weird to say the least but interesting. This coil has a resistance of 0.15ohm and is rated for 65-80W.
In addition to the two coils that come with the nexMesh Pro, I also received the two conical coils. These coils are, again, sold separately:
- H11 0.20ohm Single Conical nexM Coil (Rated for 60-70W)
- H13 0.15ohm Single Conical Net M Coil (Rated for 65-78W)
The H11 coil is a mesh coil with the same pattern as the coils that come with the original nexMesh tank. It’s a ‘plexus-style’ mesh coil where the opening gets smaller near the top of the coil. This ‘conical’ shape concentrates the flavor from the coil as it reaches the chimney. This coil design works great and it’s exactly what made the original nexMesh tank so good.
The H13 coil is a fine, net mesh coil. This coil is also conically shaped and gets narrower near the top of the coil. This coil is very specifically rated for 65-78W. What happens at 79W?
RBA Coil
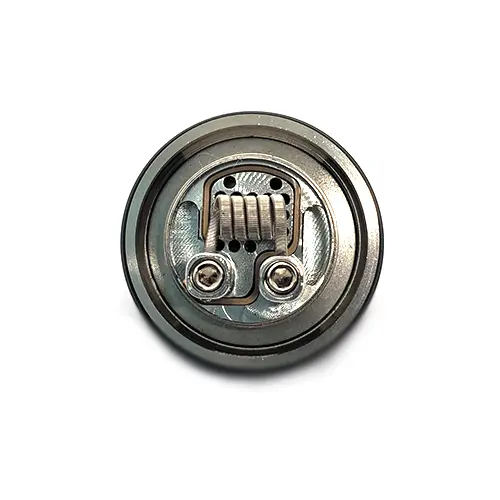
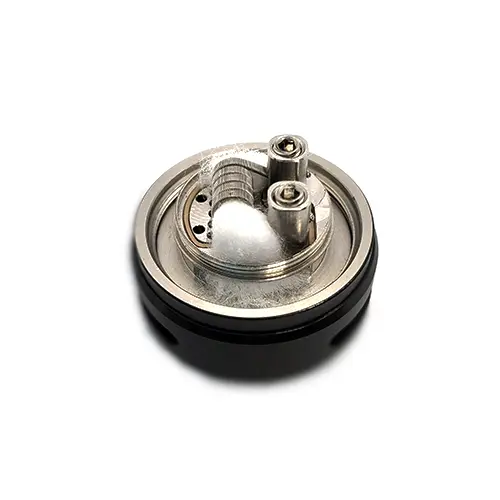
The RBA deck is, you guessed it, sold separately. But in true Wotofo fashion, it comes with everything you need to build on it. You get the deck, a framed staple clapton coil, a strip of cotton, an accessory bag with extra screws, and an allen key.
This deck is a single coil deck with two posts. The posts are side by side so your coil legs have to be on the same side, not “doing the splits”. The framed staple clapton coil that comes in the package is perfect.
The floor of the build deck has 20 small airflow holes which draw air in from the side airflow slots. This air hits the bottom and sides of your coil before travelling up through the chimney and out the mouthpiece.
The deck is really nice but I’m a little upset because Wotofo sent me the blue nexMesh Pro, but a black RBA deck. Why! Maybe this was the only color that they produced samples of but I wish they matched!
This deck is a breeze to build on. First you have to unscrew the cap around the deck. Next you’ll want to loosen the allen head screws in the posts until the terminals are clear. You don’t need to take the screws all the way out, just enough that they clear the terminals. Now you can install the coil.
I chose to use the coil that comes with the RBA but this deck should fit any coil with 4 wraps, up to a 3mm ID. Insert the coil legs into the posts and center the coil over the three rows of holes in the floor of the deck. This positioning will ensure that airflow hits the coil properly and from all angles, as intended. When you have your coil positioned properly, tighten down the post screws.
Dry firing to check for hot spots is important, so you’ll want to do that next. Install the deck onto a mod and pulse the coil at low wattages, around 20W is perfect. Ensure that the coil is glowing evenly. If not, take a pair of tweezers and run it across the surface of the coil. This should work out the hot spots.
With your coil glowing evenly you can proceed to wicking. You can use the cotton that comes in the RBA box or your own choice of cotton, it’s up to you. Remove the coil from your mod and ensure that the coil is cool before proceeding.
Thread the cotton through the coil and comb out the ends. This will make for more efficient wicking. Cut the cotton to the lip of the build deck — not the outer edge of the entire deck, but the one just inside of it.
Tuck your cotton into the wicking ports and juice it up. Replace the RBA cap onto the deck and screw the entire RBA/AFC assembly onto your nexMesh Pro.
Performance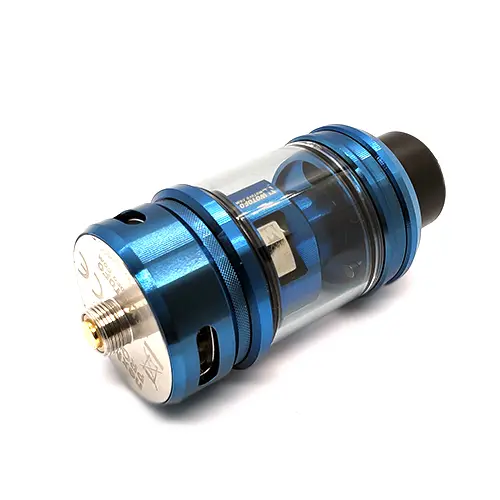
Okay, so I have a lot to go over in this section: the two stock coils, two conical mesh coils, and the RBA. I’ve used the nexMesh Pro for just about two weeks and each coil for 3-4 days. If you just want the down-low I’ll give it to you: this tank is amazing. Wotofo somehow managed to make it better than the original nexMesh.
The H15 single mesh & parallel coil comes pre-installed in the nexMesh Pro so i’ll start with it first. This coil comes out to 0.15ohm and is rated for 65-80W. At 70W the vapor is quite cool and the flavor is good but not spectacular. Clouds are decent. As you increase the wattage up to 80W it gets more flavorful and cloudy. Chain vaping and long draws aren’t an issue.
The vapor is also a tad bit warmer here at 80W than it was at 70W. At 85W (5W above the max rating) I get huge, thick plumes of vapor but the draw is still smooth. Flavor is spectacular but not much better than at 80W; it’s a small difference. I felt like I was getting close to dry hits at 85W when chain vaping so I stuck with 80W for warm, flavorful vapor and nice clouds. For not being conical, this coil is surprisingly good.
The H12 clapton is even better than the H15. This coil has a resistance of 0.20ohm and is rated for 55-75W. 55-65W doesn’t do this coil justice and it just feels underpowered. I get some flavor and clouds but it doesn’t feel like the full potential of this coil. From 65-75W is where this coil performs like I expected a clapton mesh coil to perform. I liked vaping at 75W the most as the vapor is warm and the flavor is full. I taste the intricacies of my ejuice a little more than with the H15 coil, but I would place these two coils very close in ranking.
Now for the conical mesh coils. The H11 is a mesh coil with a mesh that is nearly identical to the coils for the original nexMesh. This coil has a resistance of 0.20ohm and it’s rated for 60-70W. Flavor is extremely accurate and the vapor production is off the charts. For me, vaping at 72W was the sweet spot for this coil. If I had to make a comparison, I would say that this coil performs just like the original nexMesh kanthal coil.
The H13 coil is a fine mesh conical coil. This coil has a resistance of 0.15ohm and it’s rated for 65-78W. Probably due to the finer mesh, this coil delivers just a hair better flavor than the H11 conical mesh coil. 75W is really good with this coil and gives slightly better flavor recreation than the H11. The vapor is also warmer.
Lastly, the RBA coil. I was really expecting more out of this RBA but in the end I’m a little disappointed. Maybe it’s just that the pre-built coils are so good that they set unbelievably high expectations for the RBA, but I didn’t find the flavor to be that good for this rebuildable deck. I get some flavor coming through, but it’s muted and muddled. I only used the RBA with the included coil and cotton, so that’s what I’m basing this off of.
My rankings for the coils, from best to worst, are:
- H13 Single Conical Net M Coil
- H11 Single Conical nexM Coil
- H12 Clapton M Coil
- H15 Single M & Parallel Coil
- RBA Deck
Worth noting is that these coils go through ejuice like they’re drinking water on a hot summer day. The flavor is so good that to me it’s worth it, but if you’re using expensive ejuice beware. You’ll be going through bottles like nobody’s business! None of the coils, including the RBA, leaked on me at all.
Verdict
Wotofo have managed to fix what wasn’t broken. The nexMesh Pro is slightly better than the original nexMesh in terms of flavor thanks to the H13 Single Conical Net M Coil. The other three prebuilt coils deliver flavor that is about the same as the original coils, while the RBA deck fell far short of my expectations.
If you have the original nexMesh, the nexMesh Pro will deliver slightly better flavor with the H13 coil but I’m not sure if it’s worth upgrading for. I’ll leave that up to you to decide. If you don’t have the original nexMesh though and you’re looking to upgrade your tank, I can easily recommend that you get the nexMesh Pro. Just remember that she’s a thirsty tank!








I’ve tried the 2 coils that come with the nexmesh pro tank as well as the H13 coils and they all sucked. None of them even come anywhere close to being as good as the .15Ω SS coils in the original OFRF Nexmesh tank. What am I doing wrong?!