Aspire Flexus Q
8.8
PROS
- Nicely designed
- Three wattage adjustment levels
- MTL or RDL depending on which coil you use
- Great draw from both coils
- Flavorful coils
- Charges to 80% in 10 minutes (3A charging)
- No leaking from pods
- Very easy to get started with
CONS
- Airflow slider is very stiff
- Tinted pods
- Pod wiggles and pops out easily if dropped
- Draw activation isn't sensitive enough
Aspire is a company that has been in the vaping industry for a while now. They made a number of extremely popular pod devices, with the most popular being their ‘Breeze’ series of devices. This includes the Aspire Breeze, Aspire Breeze 2, and Breeze NXT. Aspire also produced a number of popular tanks, mods, and starter kits. The fact is that they have been in the vape game since the get-go and have been consistently producing genuinely great products.
Aspire’s latest pod vape release is the Flexus Q. One prominently advertised feature about this device is that it can charge up to 80% battery life in just 10 minutes by utilizing 3A super-fast charging. Talk about fast!
The Flexus Q uses a 2ml pod which takes replaceable coils. Two coils come included in the packaging. These coils are Aspire’s “AF” coils which use vertical mesh and organic cotton.
The Flexus Q has a built-in 700mAh battery and 3 levels of wattage adjustment. It also features both draw and button activated firing.
Box Contents
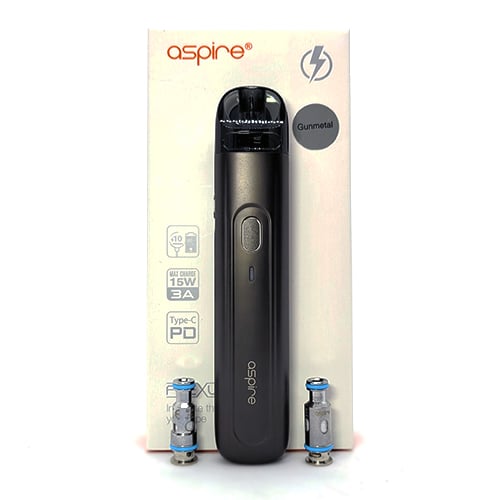
- 1 x Flexus Q Device
- 1 x Flexus Q Pod (2 ml)
- 1 x Flexus Q AF Coil (0.6Ω)
- 1 x Flexus Q AF Coil (1.0Ω)
- 1 x Type-C Cable
- 1 x User Manual
Specifications
- Dimensions: 112.8 x 22.8 x 14.2 mm
- Weight: 57g
- Pod capacity: 2ml
- Battery capacity: 700 mAh
- 3 level wattage adjustment
- Auto-draw or button activated
- Charging: Type-C, 3A fast-charging
Design & Build Quality
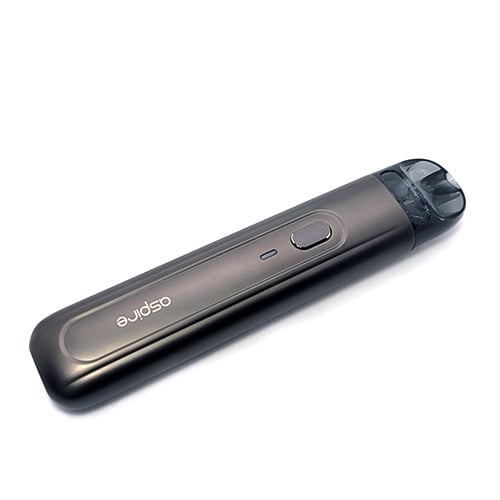
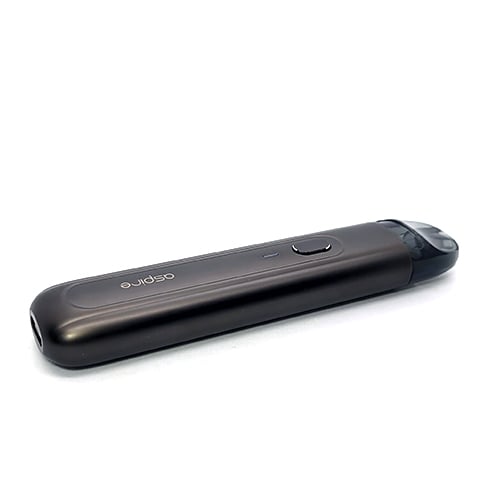
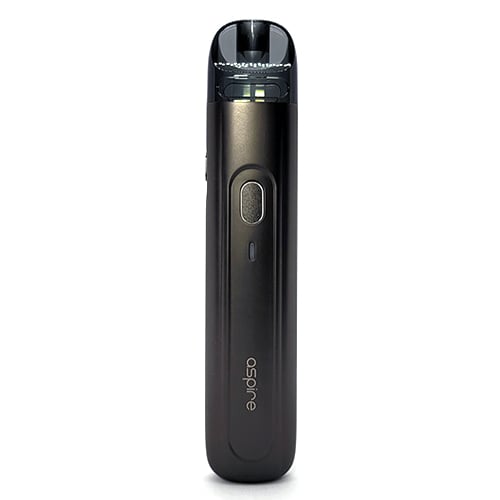
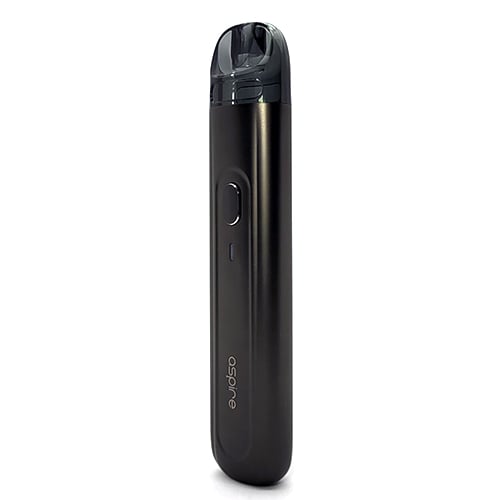
The Flexus Q is a sleek looking pod vape. I like all of the rounding on the edges and the long shape which makes it pleasant to hold. The design is minimalist inspired but it works in a sort of ‘less is more’ way for the Flexus Q. There are some clean design accent lines on the front and back which gives it a nice look. I like the design a lot
The size is perfect. It’s 112.8mm tall, 22.8mm wide, and 14.2mm deep. It also weighs just 57g. It’s a great size for a pod vape and a good weight too.
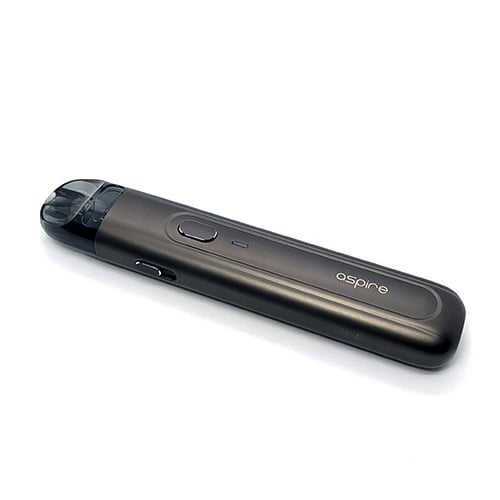
On the front side of the device there is an Aspire logo, an LED indicator, and a power/fire button. These are all slightly recessed from the rest of the device, just for aesthetic purposes, and it looks great.
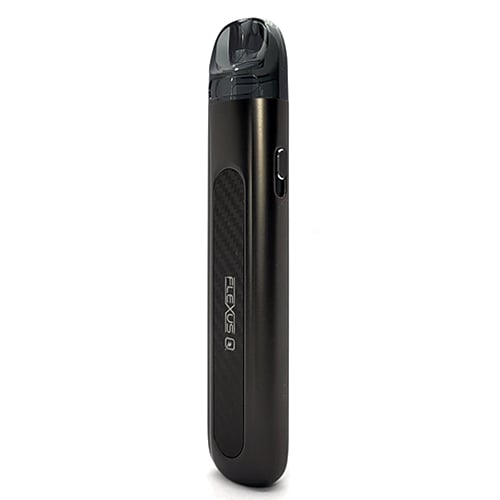
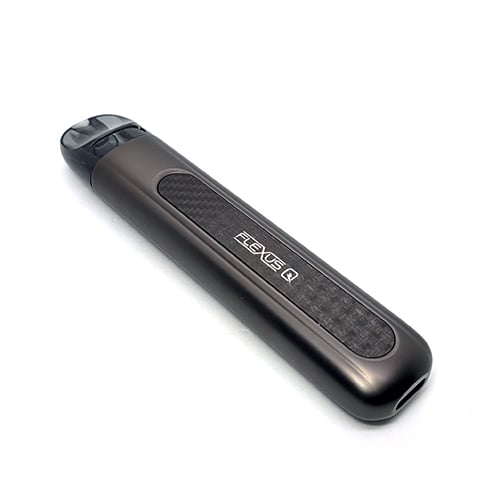
The back side of the Flexus Q has a recessed plate that is symmetrical with the front side. This plate looks like it comes in a few different designs depending on the color that you pick up. My unit is gunmetal with a carbon-fiber-like plate. The other colors available are black, red, fuchsia, turquoise gradient, aquamarine gradient, and sierra blue.
The LED indicator on the front of the Flexus Q lights up when you activate the device to take a draw. The color of the LED tells you your battery life. This LED indicator is also how you set the power level. The Flexus Q has 3 different wattage adjustment levels; low (red), medium (blue), and high (green). Pressing the fire button 3 times will change the wattage adjustment level.
The fire button is a long oval shape. It’s very tactile and pleasantly clicky. It doesn’t activate too easily so I never had any worries about it activating in my pocket. A fair amount of pressure is required to activate the button but not to the point that I ever struggled to press it down.
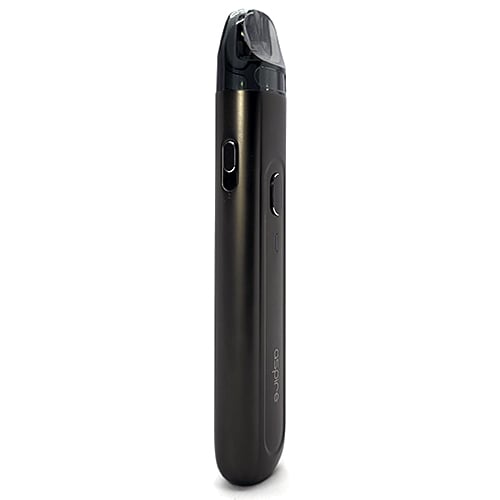
On one side of the Flexus Q is an airflow adjustment slider. Sliding it down opens up the airflow and sliding it up closes the airflow down. This slider is very stiff which makes it difficult to make fine adjustments to the airflow. There’s also not a lot of travel so there isn’t a huge range of adjustment available but I’ll get into this more in the ‘Performance’ section.
Pod & Coils
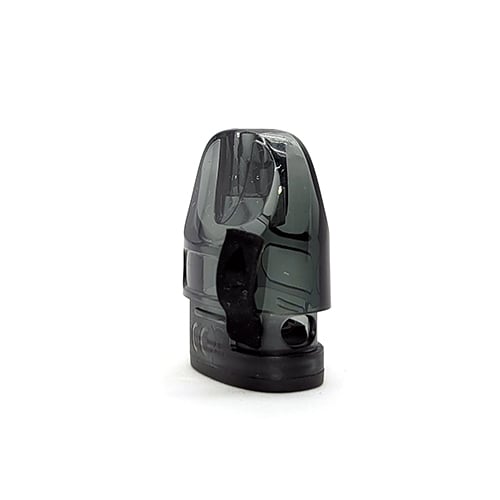
The Flexus Q comes with one 2ml pod. This pod takes replaceable coils, of which you get two in the package. The pod has a sloped, ergonomic mouthpiece that is comfortable to vape on and I have no complaints there.
The pod clicks and pressure fits into the battery. It’s a good enough fit that it won’t come out during day to day use, but I’ve dropped the Flexus Q a couple of times and the pod has popped out each and every time. There’s also a little front to back wiggle if you try to move the pod when it’s inserted. It’s not as snug as it could be so beware if you’re a little clumsy like me!
The pod is nearly transparent but it does have a light tint to it. There are little ejuice viewing sections near the bottom of the pod, where it meets the battery, that are supposed to make it easier to view your ejuice but I still found it difficult to see without a light source.
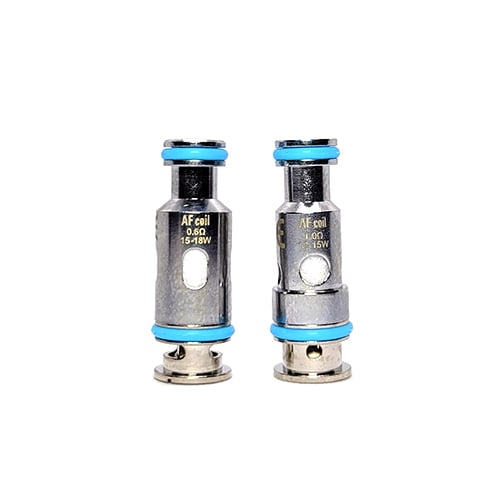
The two coils that come included in the packaging are a 0.6Ω AF mesh coil and a 1.0Ω AF mesh coil. These are vertical mesh coils that are rather tall inside of the coil and they are wicked with organic cotton. The 0.6Ω coil is a RDTL coil rated for 12-15W and the 1.0Ω coil is a MTL coil rated for 15-18W. The coils push fit into the bottom of the pod and are easy to insert and remove.
You have to remove the pod in order to fill it up. The rubber bung is located on the bottom portion of the pod which sits inside the battery when inserted. The rubber plug is thin which gives me some worries about longevity, but it does the job.
How to use the Flexus Q
The Flexus Q is a simple pod vape but it has some features that will allow you to tailor your vape to more of the way that you like it. One of these ways is the wattage adjustment levels. There are 3 wattage adjustment levels which are indicated by the color of the LED: low (red), medium (blue), and high (green). Pressing the power button three times will change the wattage level.
Depending on which coil that you are using the wattage output for each level is different. I can’t find the wattage output for each level listed anywhere, but I’m guessing that it is in the wattage range of each coil. This is 12-15W for the 1.0Ω coil and 15-18W for the 0.6Ω coil.
To start using the Flexus Q you will want to remove the pod from the device. Grab the coil that you want to use and insert it into the bottom of the pod by pushing it in. Make sure the coil is fully in there and seated properly.
Take your favorite bottle of ejuice and open up the rubber bung located near the bottom of the pod. Fill the pod up and replace the rubber bung. Now you’ll just want to wait for 5-10 minutes for the coil to saturate with ejuice.
Insert the pod into the battery. Make sure that you hear a click to ensure that the pod is properly seated.
Turn on the Flexus Q by pressing the power button five times. The LED will blink white. Press the fire button 3 times to switch to the low (red) power level. Open up the airflow on the side by sliding it all the way down. Now you can either draw from the mouthpiece or press the power button and draw to vape.
From here, adjust the airflow and power level until you find a draw that you like and that you’re comfortable with.
Battery & Charging

The Flexus Q has a 700mAh battery built-in. It uses Type-C charging. However, this isn’t your regular ol’ 2A charging — the Flexus Q is capable of 3A super fast charging that will charge from 0-80% in only 10 minutes!
I tested this super fast charging out using the included Type-C cable and a wall charger capable of 3A charging and it does indeed charge into the green battery level (60-100%) in 10 minutes. Because there is no screen with a battery life indicator percentage I can’t say for sure that it’s up to 80%, but it is at least above 60% which is impressive.
The catch with this fast charging is that you’ll need a wall charger that is capable of outputting the 3A that the Flexus Q requires so make sure that if you don’t have one, get one. They can be found cheap on Amazon and other places online.
The LED indicator will show where your battery level is at with one of three colors:
- Red: 0-30%
- Blue: 30-60%
- Green: 60-100%
The battery LED indicator will light up each time you take a draw from the Flexus Q.
Performance
 The Flexus Q is a really versatile little pod vape. You can vape MTL or RDL depending on which coil you use and how you set the airflow and it does both well.
The 0.6Ω coil is meant for RDL. This coil functions at 15-18W and I liked it best at the medium blue power level. Wide open the draw is a slightly restricted DL draw but by closing down the airflow you can achieve a more restricted draw that is near being a loose MTL. The flavor from this coil is great. The AF mesh coil delivers pronounced notes from my juices, even at these low wattages.
The 1.0Ω coil is the MTL coil which functions at 12-15W. The high green power level was the best for me, but I didn’t mind using the blue power level either. Leaving the airflow open gets me a loose mouth to lung draw which is nice, but closing the airflow down for a tighter mouth to lung draw is where it’s at with this coil. Flavor is just as good as the other coil and the draw is more to my liking so I preferred this coil over the other.
One complaint that I have about this device is the auto-draw sensitivity. Even using the 1.0Ω MTL coil, the draw activation is not sensitive enough to activate without pulling harder than I would normally. This only applies when the airflow is fully open, which is another reason why I liked closing the airflow down with this coil.
I had normal condensation in the battery portion and underneath the pod, but otherwise I had no leaking at all.
Verdict
The Flexus Q has a few faults, mainly with the design and build, but nothing that would make me write it off completely. The performance and quick charging are great and I enjoyed using this device for the entire time that I was testing.
The small size, great draw and flavor, and fast charging are all aspects of the Flexus Q that make it attractive to me. Aspire has done a good job with the performance and I don’t think that the particular cons that I found with the Flexus Q are going to be a deal breaker if you like the positive aspects of the device.
Overall it’s a solid pod vape and I suggest checking it out.





Add comment